March 18, 202620 min read24 sections
Your Definitive Guide to a Professional Home Podcast Set Up
By Fame Team
Key Takeaways
- A professional home podcast setup starts with the room's acoustic environment, not the microphone.
- Great audio is more important than great video, as listeners will tolerate poor video but not poor audio.
- A small room with irregular shapes and soft surfaces is ideal for a home podcast setup, as it naturally reduces echo and improves audio quality.
A professional home podcast set up doesn't start with a fancy microphone. It starts with the room.
Your acoustic environment is the single biggest factor in your audio quality. It’s a hard truth: great audio is more important than great video. Listeners will put up with so-so video quality—good lighting and the right clothing can compensate for a lot. What they won't tolerate is jarring, echoey audio that makes them reach for the skip button.
Laying the Acoustic Foundation for Your Home Studio
Before you even think about dropping cash on gear, your first job is to pick and treat your recording space. This isn’t about expensive soundproofing to block out the world; it’s about sound control to manage the audio inside your room.
Great gear in a bad room will always sound terrible. But even a basic mic in a well-treated room can sound impressively professional.
This is more crucial than ever. The at-home listening trend has exploded, with 63% of weekly U.S. podcast listeners now tuning in from home—a big jump from 55% in 2017. As people listen while multitasking in their own homes and offices, their expectations for clean, pleasant audio have gone way up.
Choosing the Right Room for Your Podcast
Here’s where your intuition might lead you astray. That big, open-plan living room with the high ceilings and gorgeous hardwood floors? It’s an acoustic nightmare. Sound waves ricochet off those hard, flat surfaces, creating a ton of echo (reverb) that makes your voice sound distant and unprofessional.
Instead, you want to look for the exact opposite:
- Smaller is Better: A small room gives sound waves less space to travel and reflect.
- Irregular Shapes are a Plus: Rooms that aren't perfect squares or rectangles are great because they naturally break up sound waves.
- Soft Surfaces are Your Friend: Hunt for rooms with carpet, curtains, and plenty of furniture. These things absorb sound instead of bouncing it around.
Often, a spare bedroom, a decent-sized walk-in closet, or even a cluttered home office is the perfect spot. All that "clutter"—like bookshelves, hanging clothes, or a sofa—acts as a natural sound diffuser, instantly improving your audio before you’ve spent a dime.
DIY Acoustic Treatment on a Budget
Once you've picked your room, you can take some simple, actionable steps to tame any lingering echo. Don't rush out to buy expensive foam panels just yet. Start with what you already have. Your goal is to cover or break up any large, flat surfaces—walls, floors, and even the ceiling.
Think of it as a "good, better, best" approach to getting your room dialed in.
Here’s a quick breakdown of your options, from zero-cost hacks to more professional setups.
Room Treatment Levels Good, Better, Best
| Level | Methods | Estimated Cost | Best For |
|---|---|---|---|
| Good | Use items you already own. Hang heavy blankets on walls, place pillows in corners, position bookshelves to break up reflections, and record on a carpeted floor. | $0 | Beginners on a tight budget who need a quick and effective solution. |
| Better | Purchase affordable acoustic solutions. Buy moving blankets to hang on portable stands, add a thick area rug, or build your own DIY acoustic panels with rockwool and fabric. | $50 - $200 | Podcasters ready to make a small investment for a noticeable improvement in sound quality and a more dedicated space. |
| Best | Invest in professional-grade treatment. Purchase purpose-built acoustic panels and bass traps and strategically place them based on room analysis. | $300+ | Serious podcasters who want to achieve studio-quality sound and have a permanent, optimized recording environment. |
Honestly, just start with the "Good" methods. Do a quick recording, listen back, and see if you can still hear that hollow, echoey sound. You’d be shocked at the difference hanging a couple of heavy comforters behind and to the sides of your microphone can make.
This single step is the foundation of any successful home podcast set up. For a deeper dive into specific strategies, check out our complete guide on creating the ideal podcast room setup.
Selecting the Right Gear for Your Home Podcast Set Up
Once you've sorted out your room's acoustics, you've already won half the battle for professional-sounding audio. Now, let’s talk about the fun part: the gear that will actually capture your voice. The podcast equipment world is a rabbit hole, but you can build a killer home setup with just a few key pieces. For more inspiration, check out our guides on the equipment needed for a podcast and what you need for a podcast.
The most important rule? Simplicity equals reliability. Every extra cable, adapter, or piece of software is just another thing that can break mid-recording. Our founder, Tom Hunt, still records most of his podcast, Cash Machines, from his own home—proof that you don't need a million-dollar studio for a top-tier B2B podcast.
Don’t fall into the trap of buying gear you don't understand. Start with reliable, time-tested equipment. A simple, high-quality USB microphone is often all you need to get started and produce fantastic audio for a remote B2B podcast.
This decision tree shows you exactly how to pick the right room. It might seem counterintuitive, but a small, cluttered space is almost always better than a big, empty one.
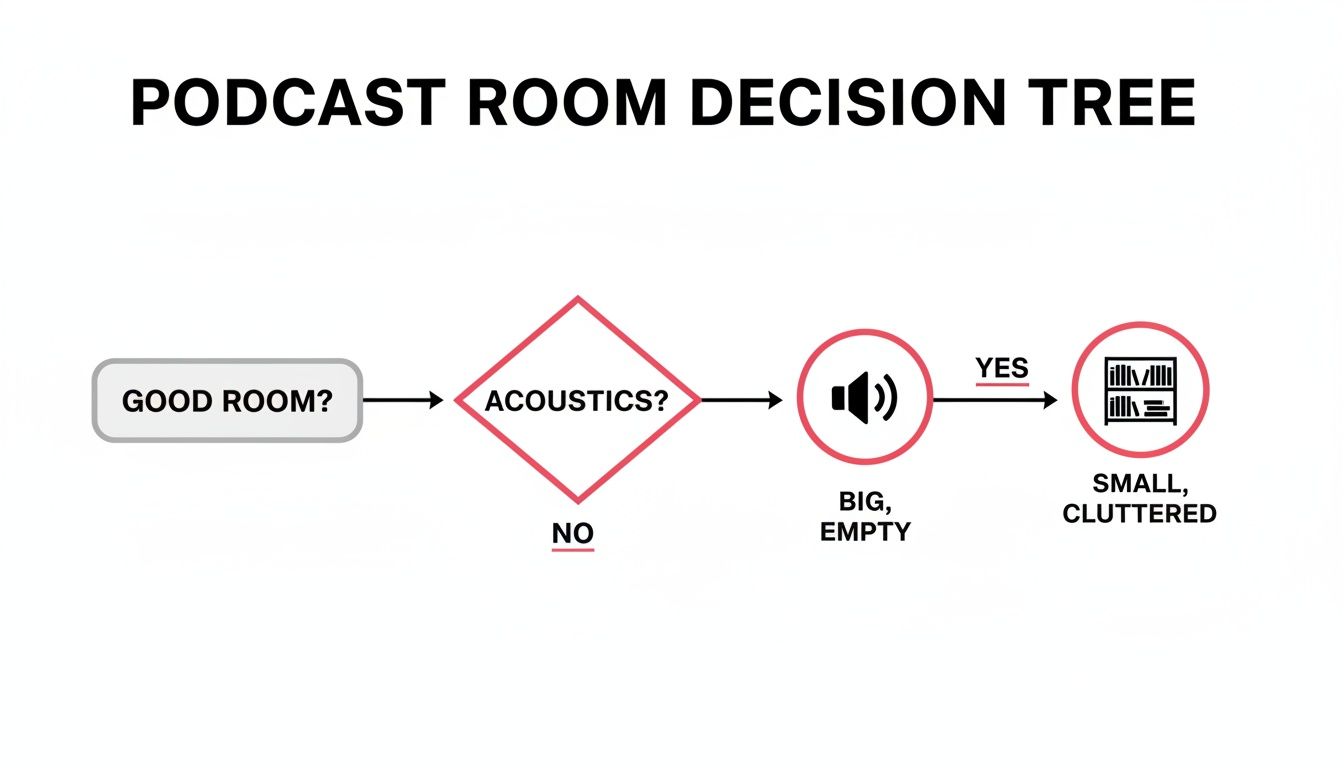
The big takeaway here is that you want to prioritize sound absorption. Soft surfaces and even a bit of clutter are your best friends for soaking up that nasty echo.
Your Essential Gear Checklist
Honestly, a great home podcast setup really only requires three things. This is your "signal chain"—the path your voice takes from you to the final recording.
- Microphone: This is what captures your voice. For most people starting a B2B show, a high-quality USB mic is the perfect choice.
- Headphones: You need these to hear yourself and your guests clearly, and to stop feedback before it starts. They must be wired. Bluetooth introduces a delay (latency) that will drive you crazy.
- Recording Software: The program on your computer where the magic happens.
That’s it. Seriously. If you're running a remote-first show, you don't need to get bogged down with a complicated mixer or audio interface just yet.
The Great Microphone Debate: USB vs. XLR
The first big gear decision you'll make is whether to go with a USB or an XLR microphone.
A USB microphone is the definition of plug-and-play. You just plug it straight into your computer, and it works. They’re simple, affordable, and the quality of modern USB mics is outstanding.
An XLR microphone is the more traditional, "pro" option. These mics connect to your computer through a separate piece of hardware called an audio interface. This gives you more flexibility if you’re doing something complex, like recording multiple people in the same room, but it also adds cost and complexity.
For a solo host or a remote interview show, a USB mic is more than enough to get the job done. We get into the nitty-gritty in our guide to the best microphones for podcasting.
Battle-Tested Microphone Recommendations
Some mics are popular for a reason—they just work, every single time. Here are a few of our go-to's.
- For Maximum Simplicity (USB): The Samson Q2U. This thing is a workhorse. It has both USB and XLR connections, so you have an upgrade path built right in. It’s also a dynamic microphone, which is fantastic at rejecting background noise—a lifesaver for imperfect home recording spaces.
- For Maximum Versatility (Hybrid): The Shure MV7. Inspired by its legendary older brother (the Shure SM7B), the MV7 is a brilliant hybrid mic. You get that rich, broadcast-quality sound with the pure convenience of a USB connection. It’s the best of both worlds.
- The Go-To for Guest Kits: The Blue Yeti. This mic is ridiculously popular for a reason: it’s dead simple for anyone to set up and use. If you have the budget, sending a Blue Yeti to a high-profile guest is a surefire way to guarantee great audio and make an unforgettable impression.
Whichever mic you pick, just pair it with a simple set of wired headphones. Even the standard Apple EarPods will do the trick. They’re light, they work, and they won't give you "headphone fatigue" on those longer recording days. Your gear should feel invisible, letting you focus all your energy on the conversation.
Mastering Remote Recordings and the Guest Experience
With your room treated and your mic plugged in, you’ve won half the battle. Your home podcast setup is officially ready for action.
But here’s the thing about modern B2B podcasting: it’s not just about how you sound. It’s about the conversation. And today, those conversations are happening remotely. Remote recording has completely changed the game, breaking down geographical barriers and making it easier than ever to book those hard-to-get, high-profile guests.
The real win with remote recording is efficiency. Remote recordings make it easier for guests to show up without travel, which means you can attract a higher caliber of guest without needing to reimburse for hotels or pay for studio time. This is key to starting a B2B podcast that features industry leaders.
This convenience, however, introduces a new variable you absolutely must control: the guest's technical setup and experience.
Choosing Your Remote Recording Platform
This is where your choice of software becomes critical. Sure, you could use Zoom or Google Meet—they’re fine for team meetings. But they are absolutely not built for creating high-quality content. Their audio and video are heavily compressed and streamed live, meaning one moment of bad Wi-Fi can completely tank your recording.
This is why dedicated remote recording platforms are a non-negotiable part of a professional podcast setup. We’re big fans of our partner, Riverside.fm, because it elegantly solves the internet problem.
Riverside, and platforms like it, work by recording each person's audio and video locally on their own computer in full, uncompressed quality. Once the interview is over, those pristine, individual files are automatically uploaded to the cloud. This means that even if the connection stutters or drops mid-sentence, the final recording is completely flawless.
That local recording capability is the secret weapon for any serious podcast. It gives you the clean, isolated tracks that are absolutely essential for a high-quality post-production workflow. This is a core part of our podcast remote recording process and something we insist on for every show we produce.
There are a few solid options out there, each with its own strengths. Here's a quick look at the top contenders.
Remote Recording Platform Comparison
| Platform | Key Feature | Max Video Quality | Best For |
|---|---|---|---|
| Riverside.fm | AI transcription & editing features | Up to 4K | B2B podcasters prioritizing video and ease of use. |
| SquadCast | Dolby.io audio processing | Up to 4K | Audio purists who want the absolute best sound. |
| Zencastr | Built-in post-production tools | Up to 4K | Creators looking for an all-in-one recording and editing solution. |
While each platform has its nuances, they all solve the fundamental problem of internet-based recording. You can't go wrong with any of them for a professional B2B show.
Setting Your Guests Up for Success
One thing people worry about is guests not having good equipment for remote recordings. You simply can't assume your guest, no matter how senior, knows how to get good audio. It's your job to guide them with a simple, crystal-clear pre-flight checklist.
A few days before the recording, send a friendly email with a few non-negotiable instructions. Keep it short and actionable.
- Use Wired Headphones: This is the most important rule. Bluetooth headphones, including AirPods, can introduce a slight delay (latency) and are prone to connection drops. Simple, wired earbuds are perfect.
- Find a Quiet Room: Ask them to find a small, carpeted room if possible. A walk-in closet is surprisingly effective! Just closing the door to block out kids, pets, or noisy colleagues makes a huge difference.
- Face a Window: Natural light is the best light. This one simple but effective action—having them sit facing a window—will dramatically improve their video quality for free.
- Close Other Applications: Unnecessary browser tabs and apps eat up computer resources. A quick restart before the call can prevent performance issues and fan noise.
These small steps make a massive difference. Not only do they improve the technical quality, but they also show your guest that you're a professional who values their time and their contribution.
The Ultimate Guest Experience Power Move
If you're interviewing a truly high-value guest and have a bit of budget, here's a strategy that guarantees phenomenal audio and makes an unforgettable brand impression: send them a microphone.
You don't need to break the bank. An affordable, high-quality USB mic like a Rode NT-USB Mini or a Blue Yeti costs around $100. Ship it to their office or home a week before the recording with a simple, one-page instruction card.
This small investment accomplishes three powerful things:
- It guarantees great audio quality. You've just eliminated the single biggest variable in remote recording.
- It makes the guest feel incredibly valued. This isn't just another podcast interview; it's a premium experience.
- It leaves them with a high-quality gift that will keep your brand top-of-mind long after the interview is over. Every time they see that mic on their desk, they'll remember you.
This single tactic elevates your show from just another content piece to a white-glove experience, reflecting the professionalism of your brand and the quality you're building with your home podcast setup.
Elevating Your Production Value
Alright, you've got your room sorted and your gear is making you sound crisp and clear. That's the foundation. But let's be honest, just having clean audio is table stakes now.
If you want your show to look and feel like a top-tier production—the kind that makes B2B buyers sit up and take notice—you need to start thinking like a producer. This is where we move past the basics and add the polish that separates the amateurs from the pros. These small, actionable moves can make a massive difference in how seriously people take your brand.
Use Multiple Camera Angles (The 'BBC Documentary' Trick)
If you start a podcast on YouTube or use social media video, a single, static camera angle gets boring. Fast. The BBC often uses multiple angles for remote interviews to keep things interesting for the viewer, and you can steal this trick.
It sounds way more complicated than it is.
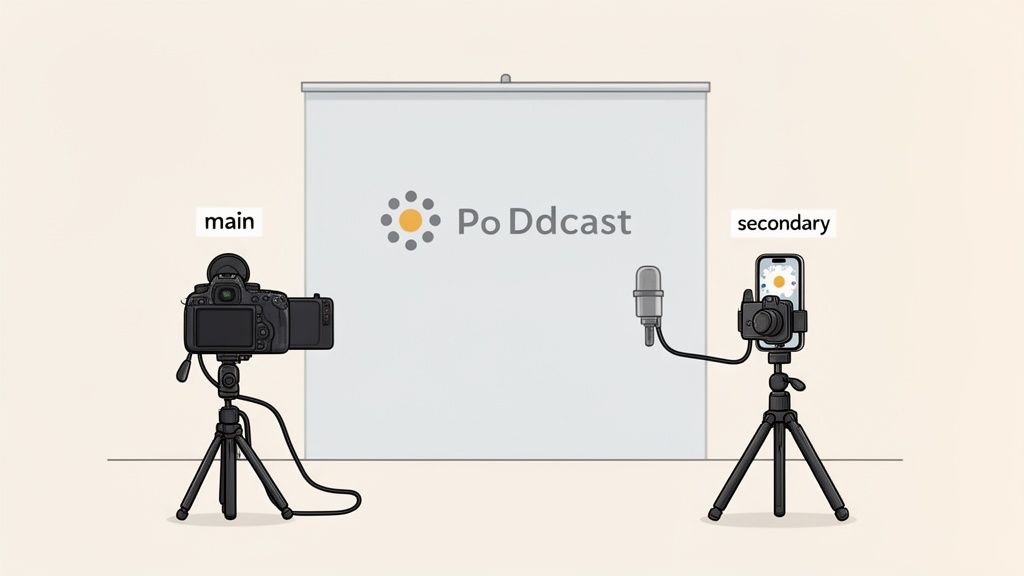
- Set up your B-Cam: Keep your main camera pointed straight at you. Then, grab your smartphone, stick it on a cheap tripod, and position it off to the side for a profile shot of you speaking with your guest on your laptop.
- Sync with a clap: Hit record on both devices. Right at the start, give one sharp, loud clap. That audio spike is your secret weapon in post-production, making it dead simple to sync both video files.
- Cut between shots: When you’re editing, you can now cut between the main front angle and the side angle. It’s perfect for emphasizing a point, cutting away from a moment where you stumbled, or just breaking up the visual monotony.
This one little trick instantly makes your show feel like a professionally shot documentary, not just a Zoom call. No extra crew, no expensive gear. Just a little bit of planning.
Create a Consistent, Branded Background
Your background is a silent billboard for your brand. A messy bedroom or a blank wall screams amateur hour and quietly kills your credibility. A well-designed space, on the other hand, reinforces your authority before you even say a word.
Your recording space is your digital stage. Whether you go for a clean, minimalist vibe or a fully branded set, the key is consistency. Your background should be instantly recognizable from one episode to the next.
Here are a couple of actionable ways to nail this:
- The Minimalist Bookshelf: It's a classic for a reason. A clean, organized bookshelf conveys authority and expertise. Just make sure you curate it. Stock it with industry-relevant books, maybe a plant for some life, and a few subtle brand touches like a mug with your logo.
- The Branded Set: For a sleeker look, go with a solid-colored background. You can get a collapsible backdrop for this, or even just paint a wall. Think about adding a neon sign of your show's logo or some artwork that fits your brand's aesthetic.
Whatever route you take, stick with it. That visual consistency is a massive part of building a recognizable brand for your podcast.
Once you have all this dialed in, the final piece is stitching it all together in the edit. If you're looking for the right tool for the job, you might want to check out our guide on the best editing software for podcasts.
Streamlining Your Post-Production Workflow
Hitting "stop record" feels great, doesn't it? But that’s only half the job. Those pristine raw audio and video files from your perfect home podcast set up are just the beginning. The real work—the editing, mixing, and creating all the assets that turn an episode into a campaign—is where most B2B podcasters get completely overwhelmed and burn out.
If you want to ship episodes consistently without losing your mind (or your entire weekend), you need a repeatable, efficient post-production workflow. Think of it as the assembly line for your content. Without one, every episode is a chaotic mess of hunting for files, second-guessing your edits, and wrestling with software. You can learn more about how to produce a podcast with a solid workflow.
The goal? Make post-production so predictable it’s almost boring.
Building Your Post-Production Engine
It all starts with ruthless organization. The second you finish recording, create a new folder for that episode. Inside, make sub-folders: "Raw Audio," "Raw Video," "Edited Files," and "Marketing Assets." This simple habit will save you from the nightmare of digging for a misplaced guest track three weeks later.
Next up, your editing software. This decision really comes down to what you value more: lightning speed or granular control.
- For Speed and Simplicity: Descript. This tool is a genuine game-changer. It transcribes your audio automatically, letting you edit the recording by just editing the text. Delete a sentence in the transcript, and the audio vanishes with it. It’s an incredibly intuitive way to edit, perfect for marketers who aren't audio engineers.
- For Professional Control: Adobe Audition. This is a full-blown digital audio workstation (DAW). It’s packed with powerful tools for noise reduction, EQ, and complex mixing. The learning curve is steep, but it gives you total command over your sound, which is why the pros swear by it.
Many B2B leaders quickly realize their time is far more valuable than the cost of outsourcing the technical edit. Your expertise is in your industry and your network, not in removing "ums" or balancing audio levels.
Honestly, this is the exact moment many teams decide to partner with a specialist. A B2B podcast agency like Fame can take the entire technical lift off your plate—the editing, mixing, mastering, and even writing show notes. This frees you up to do what you actually do best: planning incredible content and building relationships with high-value guests.
Accelerate Your Workflow with Templates and AI
The secret to scaling production isn't working harder; it's working smarter. Episode templates are a massive shortcut. In your editing software, create a project template that’s pre-loaded with your intro music, outro, and any other recurring segments. For every new episode, you just duplicate the template and drop in the new conversation. Simple.
This is also where you can get a serious edge. At Fame, we use Fame AI to instantly generate a whole suite of assets from a single finished recording:
- Full Transcripts: Essential for accessibility and SEO.
- Detailed Show Notes: Complete with timestamps and key takeaways for listeners.
- Social Media Clips: Dozens of shareable video snippets and text-based posts to drive traffic to the episode.
This process turns one recording into a full-on marketing campaign in minutes, not days. If you want to get into the weeds of structuring this, we’ve mapped out our entire system in this guide on creating a podcast production workflow.
Once your episode is polished and ready, you can’t just throw it out there and hope for the best. You need to implement powerful podcast marketing strategies to make sure your hard work actually finds an audience. With listeners projected to hit 619 million by 2026, the audience is there—but you have to be smart about grabbing their attention.
Your Home Podcast Setup Questions, Answered
Alright, you get it. You've seen what a B2B podcast can do for authority and pipeline. Now you just have to build the thing. Let's cut through the noise and answer the real questions we hear every day about creating a professional home podcast setup that actually delivers.
What's the Single Most Important Part of a Home Podcast Setup?
Everyone wants to talk about the microphone. It’s shiny, it’s exciting. But the mic isn't the hero here. The real answer? Your room. Your recording environment is everything.
A world-class, $1,000 microphone in a kitchen with tile floors and echoing walls will sound absolutely terrible. Unlistenable, even. But put a decent, mid-range mic in a well-treated room, and you'll sound like a pro.
Your audience will forgive shaky video. They will never forgive bad audio. Focus on taming your space first, then spend what's left of your budget on the best microphone you can afford.
Think of it as a hierarchy. A great room with a decent mic always, always beats a great mic in a bad room. Get this right, and you've already won half the battle.
How Can I Guarantee My Remote Guests Have Good Audio?
You can't. But you can stack the deck in your favor with a little prep and the right tech.
First off, ditch Zoom and use a dedicated remote recording platform. We're partnered with Riverside.fm for one simple reason: it solves the internet problem. It records everyone’s audio and video locally, meaning even if your guest’s connection drops, the final files are perfectly clean. It's a non-negotiable for us. You can see our full workflow in this guide on how to record podcasts remotely.
Second, you have to guide your guests. Don't assume they know what to do. A few days before you record, send a dead-simple one-pager with these rules:
- Wired headphones only. No AirPods. Bluetooth introduces lag and connection headaches.
- Find a small, quiet room. A carpeted bedroom beats a big, open-plan living room every time.
- Face a window. Natural light is the best (and free) key light you'll ever find.
- Close every other app. This frees up computer resources and stops the dreaded fan noise from kicking in.
If the guest is a big deal, here’s a power move: mail them a USB mic like a Blue Yeti. It completely solves the audio question and makes an incredible first impression. We break down more guest prep tips in our guide on how to prepare for a podcast guest appearance.
Is a USB Mic Good Enough, or Do I Need an Audio Interface?
For most B2B podcasters starting a remote show, a high-quality USB microphone isn't just "good enough"—it's the smart move.
Today's USB mics sound fantastic, they're affordable, and they just work. Plug it in and you're ready to record. This follows a key principle for any solid home setup: kill unnecessary complexity. Every extra cable, every extra box, is just another thing that can break right before an interview. You can find plenty of other guides on the equipment needed for a podcast that back this up.
You only need to start thinking about an XLR mic and an audio interface when your show gets more complex. An interface is a must-have if you plan to:
- Record two or more people in the same room, each with their own microphone.
- Use a specific high-end microphone that needs phantom power.
- Get granular, hands-on control over your audio levels as you record.
But for a solo host or a standard remote interview show? Start with a great USB mic. Our founder, Tom Hunt, still uses a simple and effective home setup to record most episodes of his podcast, Cash Machines.
How Do I Turn My B2B Podcast Into a Lead Generation Engine?
A killer home setup is the foundation, but strategy is what builds the pipeline. To get leads, you have to treat your podcast like a central marketing asset, not just a folder of audio files.
This means your whole process, from planning to promotion, needs to be wired for business goals. Here’s how we think about it:
- Content Strategy: Your episodes have to be about the exact pain points of your Ideal Customer Profile (ICP). If you don't know what to talk about, our guide on planning a podcast is a good place to start.
- Guest Strategy: Stop interviewing your friends. Invite the people your prospects look up to. This borrows their authority and attracts the right listeners.
- Promotion Strategy: This is where the magic happens. A single episode is not a single piece of content. It’s the raw material for dozens of micro-assets.
At Fame, this is the core of our B2B podcast production services. We take one recording and turn it into a full-funnel campaign—social clips, SEO articles, email snippets, the works. Then we use our dedicated B2B Social Media Agency and B2B Email Newsletter Agency to make sure that content gets in front of decision-makers.
The goal is to stop just making a podcast and start building a system that drives authority, traffic, and qualified leads back to your business.
Ready to stop fighting with tech and start building a podcast that actually grows your business? At Fame, we manage the whole system—strategy, production, and promotion—so you can focus on being the expert. Book a call with us to see how we can turn your show into a pipeline machine.
Want us to run this for you?
Fame starts and grows B2B podcasts that generate pipeline. Tell us who you are trying to reach and we will send a costed proposal within 48 hours.
Related content
- Read moreFame Team · July 16, 2026
10 Account Based Marketing Tactics For B2B Growth In 2026
Discover 10 actionable account based marketing tactics for B2B tech. Learn to use podcasts, data, and targeted content to close high-value accounts. - Read moreFame Team · July 16, 2026
The 8 Best Brighton Podcast Agency Picks For 2026
Find the best Brighton podcast agency for your B2B brand. Our 2026 guide reviews top 8 agencies for production, growth & ROI. Expert analysis here - Read moreJune 10, 2026
20 Best Podcast Production Agencies For 2026 (And Why Should You Hire One)
Global podcast and vodcast ad revenues are on track to hit $5 billion in 2026 , up 20% year-on-year. - Read moreApril 13, 2026
Leadership In Marketing: The B2B Podcast Playbook
Most companies still confuse leadership in marketing with job titles, org charts, and budget control. That's outdated.