October 24, 202516 min read7 sections
Equipment Needed For A Podcast: A Step-By-Step Gear Guide
By Fame Team
Key Takeaways
- Invest in a good quality microphone that captures warmth and clarity, and choose between dynamic and condenser mics based on your recording environment and budget.
- Use closed-back headphones to detect unwanted background noise before it ruins a take, and consider an audio interface or mixer for increased control and future-proofing.
- Add simple accessories like pop filters, boom arms, and high-quality cables to enhance your final product and ensure a smooth, professional sound.
Your Complete Podcast Equipment Checklist
Getting your B2B podcast off the ground starts with three essentials: a microphone to capture your voice, headphones to monitor sound in real time, and reliable recording software on your computer. From there, you can add accessories like pop filters and boom arms to elevate your final product from good to great.
Think of it this way: building a professional-sounding show is like laying a sturdy foundation before decorating a home. Nail these basics, and your audience will stay tuned in. Skip them, and even the most brilliant insights can get lost in crackles and hiss.
Essential Gear Basics
- Microphone: Your voice is the core of your show, so invest in a mic that captures warmth and clarity. The choice between a dynamic or condenser mic will depend on your recording environment and budget.
- Headphones: Don't guess how you sound, listen as you record. Closed-back headphones are crucial for detecting unwanted background noise before it ruins a take.
- Audio Interface or Mixer: If you choose an XLR mic, you'll need an interface or mixer to convert its analog signal into clean, digital audio. USB mics plug straight into your computer, but an interface offers more control and future-proofing.
- Recording & Editing Software: From free tools like Audacity to subscription platforms like Descript, select software that aligns with your technical skills and editing goals.
Accessories That Elevate Your Sound
A basic setup in a well-treated space will consistently outperform premium gear in an echo chamber. Keep it simple and reliable.
- Pop Filter Or Windscreen: This simple accessory softens the harsh "p" and "b" sounds (plosives) that can create an unpleasant pop in your audio, ensuring your delivery is consistently smooth.
- Boom Arm or Mic Stand: Free up desk space and maintain perfect mic positioning. A flexible boom arm gives you ergonomic freedom, while a sturdy stand is a budget-friendly alternative.
- Cables (XLR or USB): Match the cable to your mic. Quality cables are essential to prevent hiss and audio dropouts, preserving the integrity of your recording.
Podcast Equipment Tiers for B2B Podcasters
Here’s a practical comparison to help you choose the right tier based on your budget and goals.
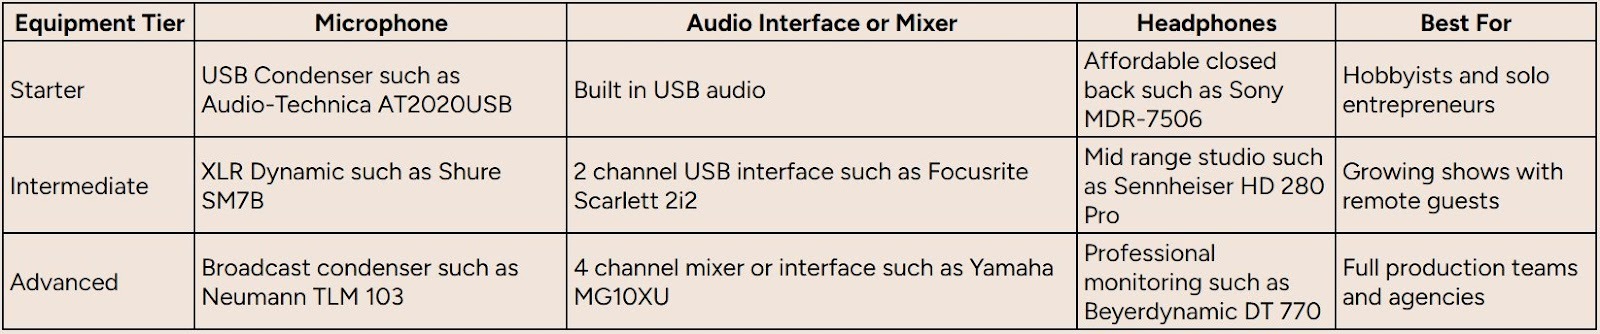
Use this table as your starting point, then customize it to fit your specific needs. These tiers are designed to scale, from a simple one-person setup to a complete studio.
Ready to dig deeper into fine-tuning your gear? Check out our guide on the best podcasting setup. If you’re planning a video podcast, don’t miss a detailed wedding videography equipment list for camera recommendations and lighting tips.
Choose the Right Microphone for Your Voice
Your microphone is the single most critical piece of equipment in your podcasting setup. It’s the first link in the chain that converts your expertise and authority into an audio experience your audience can connect with.
Getting this right isn't just about capturing sound; it’s about shaping your listener's entire experience and their perception of your brand. A bad mic makes you sound distant and unprofessional, but the right one pulls people in.
The two main types of microphones are Dynamic and Condenser. A helpful way to think about them is this: a dynamic mic is a rugged, dependable pickup truck. It’s built to isolate your voice and reject a lot of background noise, which is perfect if you're recording in a typical home office or untreated room.
A condenser mic, on the other hand, is like a high-performance sports car. It's incredibly sensitive and captures every subtle detail of your voice. But that sensitivity means it will also pick up every distracting sound around you, keyboard clicks, a humming air conditioner, or a dog barking down the hall.
Dynamic vs. Condenser Mics
For the vast majority of B2B podcasters recording at home or in an office, a dynamic microphone is the smarter, safer choice. It excels at focusing only on what's directly in front of it, giving you a clean, punchy vocal sound without capturing excessive room echo.
- Actionable Step: If your recording space has any background noise or isn't acoustically treated, choose a Dynamic Mic like the Shure SM7B or Rode Procaster. Their lower sensitivity is a feature, not a bug; it helps minimize background noise and delivers that classic, focused "radio" sound.
- Actionable Step: If you have a dedicated, dead-quiet studio, a Condenser Mic like the Rode NT1 or Neumann TLM 102 will provide crisp, detailed audio that captures the full frequency range of your voice.
USB vs. XLR Connections
Next, you need to decide how to connect your mic to your computer. You have two primary options: USB or XLR. This choice affects both the simplicity of your setup and your ability to expand it later.
A USB mic is the ultimate plug-and-play solution. It has an audio interface built directly inside it and connects straight to your computer's USB port. This is the simplest and most direct way to start recording high-quality audio right out of the box.
An XLR microphone is the professional standard. It uses a three-pin connector that plugs into a separate piece of gear called an audio interface, which then connects to your computer. While it adds one more component to your desk, an XLR setup provides superior sound quality, more control over your recording levels, and the flexibility to add more mics for co-hosts or guests. To see how this fits into the larger process, check out our guide on how to record a podcast.
This decision tree helps visualize how your initial equipment choices cascade.
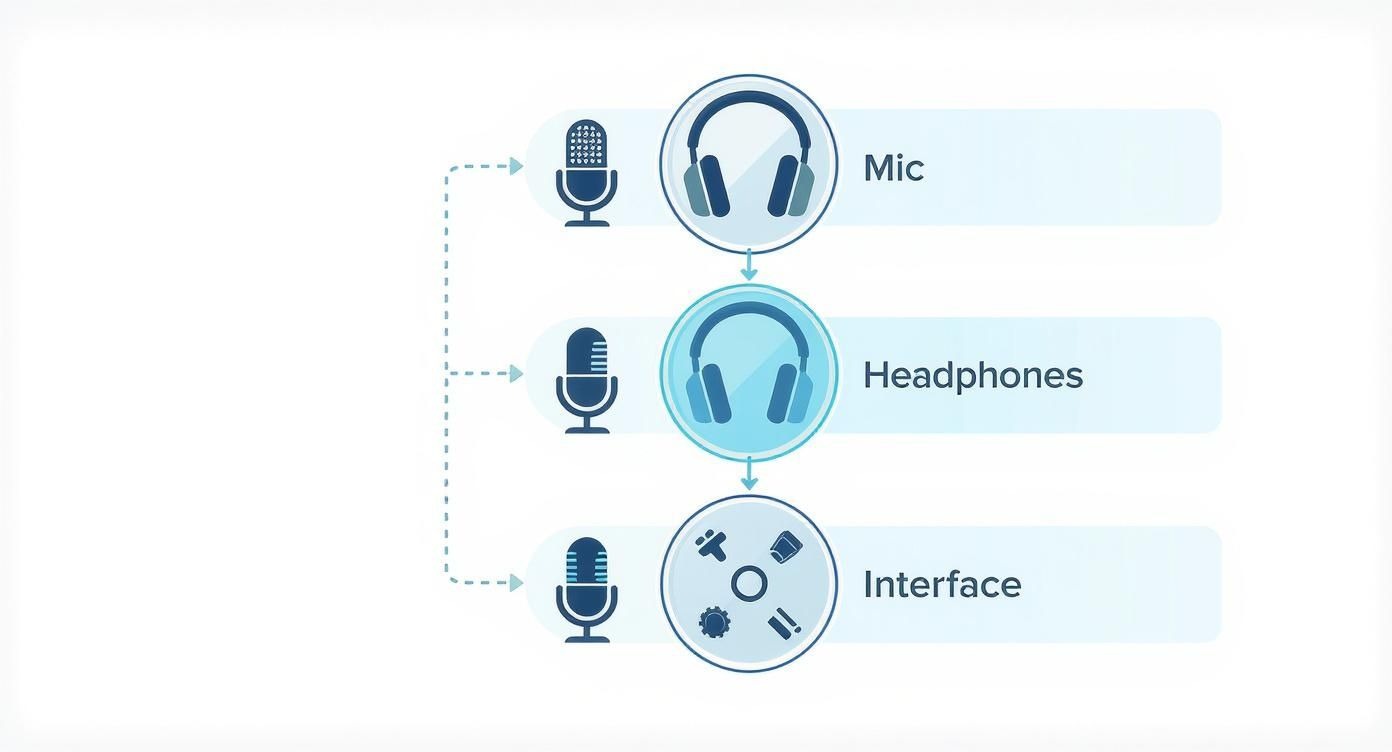
As you can see, the path you take with your microphone directly influences whether you need an audio interface. That, in turn, impacts your setup's overall complexity and budget. Nailing this choice from the start ensures your gear can grow right alongside your show.
Set Up Your Audio Interface and Mixer
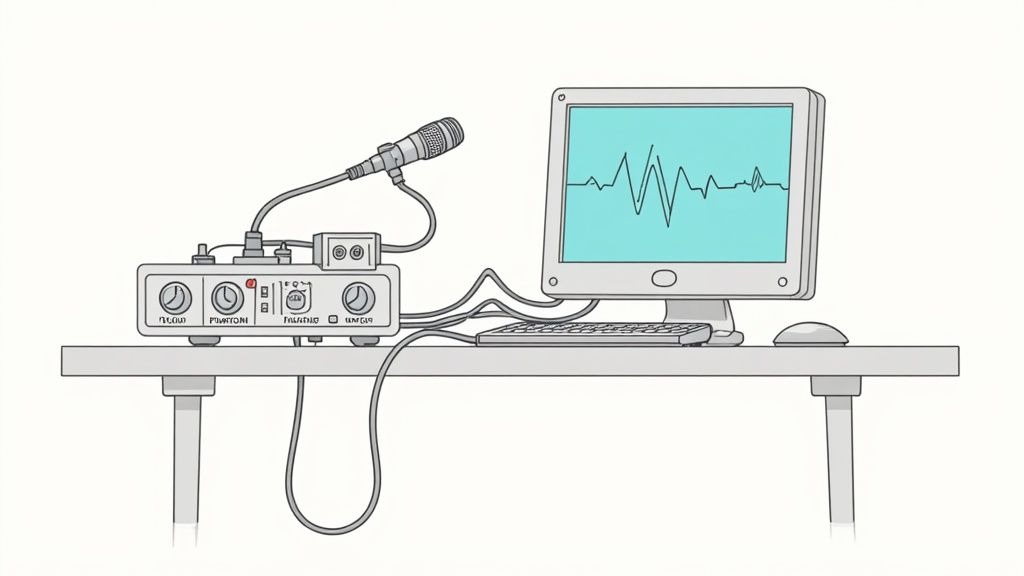
So, you've selected a professional XLR microphone. The challenge? You can't just plug it into your computer. You need a translator that converts your voice into a digital signal your software can understand. That's where an audio interface comes in.
Think of it like a coffee grinder. You can have the best beans in the world, but without a grinder to unlock their flavor, you just have a bag of potential. Your interface "grinds" the analog audio from your mic, preparing it for your recording software to "brew."
These devices handle several critical jobs: they convert your analog signal to digital, give you control over the input level (gain), and provide the phantom power (48V) required by condenser microphones to operate.
Key functions you'll rely on:
- Phantom Power: Supplies the stable voltage that condenser mics need to operate.
- Gain Control: Lets you dial in the perfect input volume to avoid quiet, hissy audio or loud, distorted clipping.
- Direct Monitoring: Allows you to hear your own voice in your headphones in real-time, with zero lag.
For solo hosts or simple two-person interviews, a compact interface is all you need. The Focusrite Scarlett 2i2 is a classic for a reason; it’s a workhorse that handles two XLR mics, has clean-sounding preamps, and includes a headphone output for monitoring.
Direct monitoring is a non-negotiable for B2B podcasts. It’s your secret weapon for catching awkward plosives, background noise, or other audio blips live, ensuring you always sound on-brand.
When to Use a Mixer
What if you're planning a show with multiple hosts and guests, or you want more hands-on control? That’s when you step up to a mixer. A mixer like the Rodecaster Pro is more than just a grinder; it's a full-on barista station. It not only handles the basics but adds sound pads for jingles, built-in EQs, and even phone integration for call-in guests.
A mixer is the right call when you need:
- Multiple Channels for several hosts and guests at once.
- Built-in Processing, like compression and EQ, Q to shape your sound live.
- Onboard Recording directly to an SD card as a backup or main recording.
Actionable Step: Before buying, map your gear to your ambition. A solid two-channel interface can be had for under $200, while a do-it-all mixer might run over $500. Start with what you need and upgrade only when your show's growth demands it.
Plan Your Future Upgrades
Don't just buy for today; think about where your show is headed. Having a clear upgrade path saves you from buying the same piece of gear twice.
Use these triggers as your guide:
- More Channels: When you regularly host three or more people, it's time for a mixer.
- Advanced Processing: If you want to add effects or compression without fussing with software, look for an interface or mixer with these features built in.
- Mobility: If you plan on recording on the road, a compact, bus-powered unit that draws power from your laptop is a lifesaver.
Choosing the Right Setup
So, interface or mixer? The answer depends on your recording space and your five-year plan. If you’re in an untreated room, a simple interface keeps things from getting too complicated. But if you want total control over the audio environment and the ability to edit on the fly, a mixer is a powerful tool.
The demand for quality gear is exploding. Projections show the global podcasting hardware market is set to leap from $3.6 billion to $28.07 billion by 2034, growing at a 22.8% CAGR. North America alone accounts for over 35.6% of that revenue in 2024. The takeaway? Investing in the right foundation now puts you ahead of the curve.
For a deeper dive into other essential gear like cables, stands, and software that will pair perfectly with your new interface, check out our complete podcast tools guide.
Dress Up Your Mic for Studio-Quality Sound
You’ve selected your microphone and audio interface. Now it’s time for the accessories, the small, often-overlooked pieces that truly separate an amateur recording from a polished, professional show.
These accessories are the secret sauce, managing the subtle details that your listeners will absolutely notice, even if they can’t pinpoint exactly why your audio sounds so clean. And the best part? You don't need to break the bank. Smart choices here deliver the biggest return on investment.
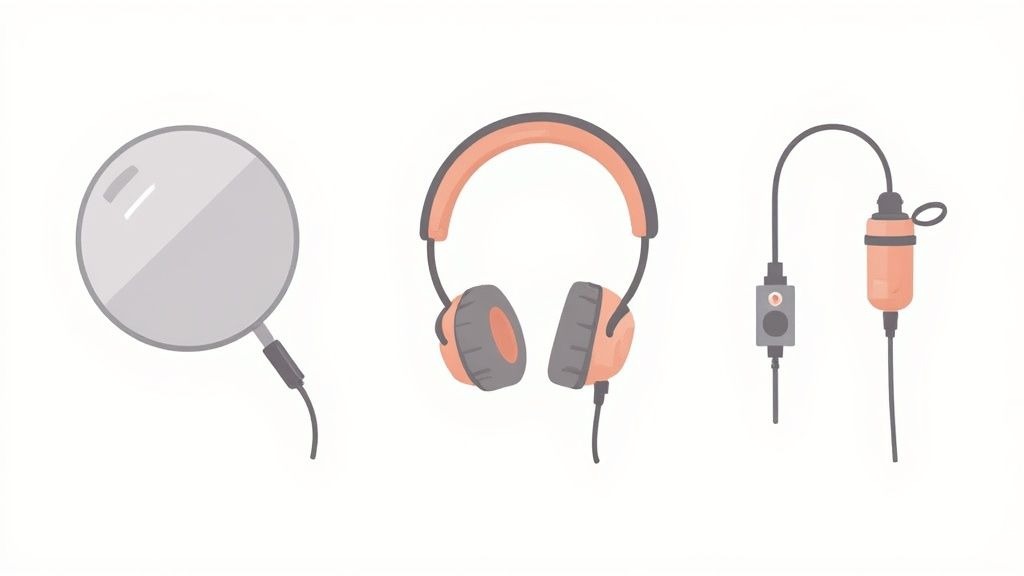
Must-Have Audio Accessories
Think of these items as the essential support team for your microphone. Each one solves a specific problem that can easily ruin a great recording.
- Pop Filter or Windscreen: This is non-negotiable. A pop filter is the mesh screen placed in front of a mic to stop harsh "p" and "b" sounds, known as plosives, from causing a jarring pop in the audio. It’s a simple guardrail for smooth, professional sound.
- Boom Arm or Mic Stand: A boom arm is a game-changer. It clamps to your desk, allowing you to position the mic perfectly without taking up valuable desk space. This helps you maintain a consistent distance from the mic, which is key for steady audio levels. A basic desktop stand is a good budget alternative.
- Closed-Back Headphones: While any wired headphones will work in a pinch, closed-back models are the industry standard for a reason. They create a seal around your ears that prevents audio from your headphones from "bleeding" into your microphone. This is critical for interviews, as it stops an echo of your guest's voice from being recorded on your track.
- Quality XLR Cables: If you opted for an XLR mic, don't skimp on the cable. A well-shielded cable protects your audio signal from electrical interference, which is the source of annoying hum or buzz in low-quality recordings. It’s a small investment to preserve the clean signal you worked so hard to capture.
For a full rundown of all the gear you might need to get your B2B show off the ground, check out our complete guide on the essential podcast equipment needed.
Pick the Best Software for Recording and Editing
Once your audio signal enters the computer, the real magic happens in your software. This is where you transform raw recordings into a polished episode that captivates your B2B audience.
Your primary workspace is a Digital Audio Workstation (DAW). Think of it as your editing suite: you arrange clips, remove mistakes, balance levels, and layer in music until every element is perfect.
Choosing Your Recording And Editing Software
Actionable Step: If you’re just starting, use free DAWs like Audacity (PC/Mac) or GarageBand (Mac). They provide all the essential tools for recording multiple tracks, cutting out errors, and exporting your final file without any cost.
Once your podcast grows, a premium DAW can significantly speed up your workflow. Adobe Audition and Descript, for example, offer advanced noise reduction, precise EQ controls, and AI-driven features like transcript-based editing that can dramatically reduce your post-production time.
- Free DAWs (Audacity, GarageBand): User-friendly tools for basic multi-track recording and trimming
- Premium DAWs (Adobe Audition, Descript): Add features like spectral repair, clip grouping, and automated filler-word removal
For a comprehensive walkthrough of the post-production process, be sure to read our guide on how to edit a podcast.
Platforms For Remote Interviews
Recording interviews over standard video conferencing tools often results in compressed audio and frustrating dropouts. A dedicated remote recording platform solves this by capturing each person’s audio track locally, ensuring pristine sound regardless of internet stability.
Recording interviews on standard video calls squeezes out quality and can make your podcast sound thin.
Platforms like Riverside.fm and SquadCast deliver separate, high-fidelity audio (and video) tracks for every participant. This gives you complete control in post-production, eliminating the need to fix garbled audio or patch gaps.
Hosting And Distribution Platforms
After editing, your episode needs a home and an RSS feed. A podcast host stores your audio files and generates this feed, allowing platforms like Spotify and Apple Podcasts to distribute your show without straining your website's server.
Popular hosting services include:
These hosts simplify distribution by submitting your podcast to all major directories with just a few clicks. With global podcast listenership projected to reach 584.1 million by 2025, a reliable host ensures your B2B show is accessible to this expanding audience. Discover more insights about podcast listenership trends at Backlinko.
Invest in Promotion to Grow Your B2B Podcast
You've acquired the right equipment needed for a podcast and recorded a great episode. That's a fantastic start, but it's only half the battle. Professional audio quality gets you in the game; strategic promotion is how you win.
Without a solid marketing plan, even the most polished B2B podcast is an expensive asset that no one hears. It won't generate leads, build brand authority, or contribute to your pipeline. Promotion is what breathes life into your content, turning it into a powerful relationship-building engine.
What are the benefits of investing in B2B podcast promotion?
Investing in B2B podcast promotion transforms your show from a static piece of content into a dynamic business development tool. The key benefits include:
- Increased Brand Visibility and Authority: Promotion puts your expertise in front of a targeted audience, establishing your company as a thought leader in your niche. Podcast marketing services can boost your company's visibility by strategically placing your content on platforms where your ideal customers are already active.
- Qualified Lead Generation: By reaching the right decision-makers, your podcast becomes a consistent source of high-intent leads who are already engaged with your message.
- Content Multiplication: A single episode can be repurposed into dozens of micro-assets (clips, quotes, articles), maximizing your content ROI and feeding your entire marketing ecosystem.
- Strategic Networking: Featuring influential guests and leveraging their networks provides a warm introduction to new, highly relevant audiences, accelerating trust and growth.
What are effective B2B podcast promotion strategies?
Effective B2B podcast promotion is a multi-channel effort designed to meet your audience where they are. Here are some of the most impactful strategies:
- Guest Network Leverage: This is a crucial tactic. Before the interview, create a promotional toolkit for your guest with pre-written social posts, audiograms, and links. Coordinate a launch-day push across their social channels and, most importantly, their email newsletter. This is an instant reach multiplier.
- Targeted Social Campaigns: Don't just post a link. Create compelling audiograms and short video clips for platforms like LinkedIn. Run targeted ads against these snippets to place your best insights directly in the feeds of executives in your target industries.
- Systematic Content Repurposing: A 30-minute episode can fuel your content calendar for weeks. Turn key takeaways into SEO-optimized blog posts, create a punchy Twitter/X thread, design an infographic, and craft a detailed LinkedIn article. This captures attention from people who prefer different formats.
- Email and Newsletter Marketing: Promote new episodes to your own email list. Share key insights and a clear call-to-action to listen, turning your subscriber base into a reliable source of initial downloads.
- Community Engagement: Share your episode in relevant LinkedIn Groups, Slack communities, or online forums where your ideal customer profile seeks information. Frame it as a solution to a common problem, not just a link drop.
As our founder, Tom Hunt, always says, "A B2B podcast is a business development tool disguised as a piece of content. Its value is unlocked through strategic distribution, not just pristine audio."
Here at Fame, we specialize in turning great audio into tangible business results. Our B2B Social Media Agency builds laser-focused campaigns on LinkedIn, while our B2B Email Newsletter Agency helps transform your episodes into high-impact newsletters that nurture leads. For an even broader reach, consider incorporating PPC and SEO tactics for podcast promotion.
By investing properly in promotion, you ensure your podcast doesn't just sound professional; it actively works to grow your business.
Podcast Equipment FAQ
Jumping into the world of podcast equipment can feel like learning a new language. This FAQ guide tackles the most common questions from B2B podcasters, giving you straight, actionable answers so you can hit record with confidence.
What Is the Absolute Minimum I Need to Start a Podcast?
You can get started with just three things: a decent USB microphone, a computer, and a pair of wired headphones. A workhorse mic like the Audio-Technica AT2020 plugs directly into your computer, so no other complex gear is needed.
For software, free tools like Audacity or GarageBand are more than capable of handling recording and basic editing. For a small investment, add a pop filter, a simple screen that sits in front of your mic and makes a massive difference by softening harsh "p" and "b" sounds.
When Should I Upgrade from a USB Mic to an XLR Setup?
It's time to upgrade to an XLR microphone and an audio interface when your show's ambitions outgrow your simple USB setup.
Make the jump if you find yourself in these situations:
- You are regularly hosting multiple guests in the same room and need to plug in more than one microphone.
- You want more hands-on control and physical knobs to fine-tune your recording levels in real-time.
- Your podcast is becoming a flagship piece of content for your brand, and you are aiming for top-tier, crystal-clear audio fidelity.
Do I Need to Soundproof My Recording Space?
Probably not. Full, professional soundproofing is overkill for most podcasters. The real goal is acoustic treatment, which simply means reducing echo and reverb in your room.
You can achieve fantastic results by recording in a smaller space with plenty of soft surfaces. Think walk-in closets full of clothes, or a home office with a thick rug, heavy curtains, and bookshelves. If you want to take it a step further, adding a few acoustic foam panels to the walls will absorb even more sound reflections, giving you a clean, tight studio sound without a major investment.
How Do I Maintain and Troubleshoot My Equipment?
A little prevention goes a long way. The secret is a quick "pre-flight checklist" before every recording session. This will save you from 99% of technical headaches.
Actionable Step: Your Pre-Record Checklist
- Check Cables: Ensure all cables are plugged in snugly at both ends.
- Confirm Phantom Power: If using a condenser mic, glance at your audio interface and confirm the 48V phantom power is switched on.
- Test Audio: Put on your headphones, speak into the mic, and listen. Check your recording levels in your software and listen for any weird buzz or hiss.
Keeping your gear tidy and running through this simple check will ensure it performs reliably for years to come.
Ready to turn that professional setup into a pipeline-generating machine? Fame is the B2B podcast production agency for companies that want to build authority and drive real business results. We take care of everything, from strategy and production to promotion, so you can focus on what you do best. Start Your B2B Podcast with Fame.
Want us to run this for you?
Fame starts and grows B2B podcasts that generate pipeline. Tell us who you are trying to reach and we will send a costed proposal within 48 hours.
Related content
- Read moreFame Team · July 16, 2026
10 Account Based Marketing Tactics For B2B Growth In 2026
Discover 10 actionable account based marketing tactics for B2B tech. Learn to use podcasts, data, and targeted content to close high-value accounts. - Read moreFame Team · July 16, 2026
The 8 Best Brighton Podcast Agency Picks For 2026
Find the best Brighton podcast agency for your B2B brand. Our 2026 guide reviews top 8 agencies for production, growth & ROI. Expert analysis here - Read moreJune 10, 2026
20 Best Podcast Production Agencies For 2026 (And Why Should You Hire One)
Global podcast and vodcast ad revenues are on track to hit $5 billion in 2026 , up 20% year-on-year. - Read moreApril 13, 2026
Leadership In Marketing: The B2B Podcast Playbook
Most companies still confuse leadership in marketing with job titles, org charts, and budget control. That's outdated.