Key Takeaways
- High-quality audio is crucial for B2B brands to establish credibility and trust with listeners.
- Poor audio quality can lead to listening fatigue and cause listeners to tune out.
- Professional audio conveys expertise and respect for the listener's time, creating an engaging experience.
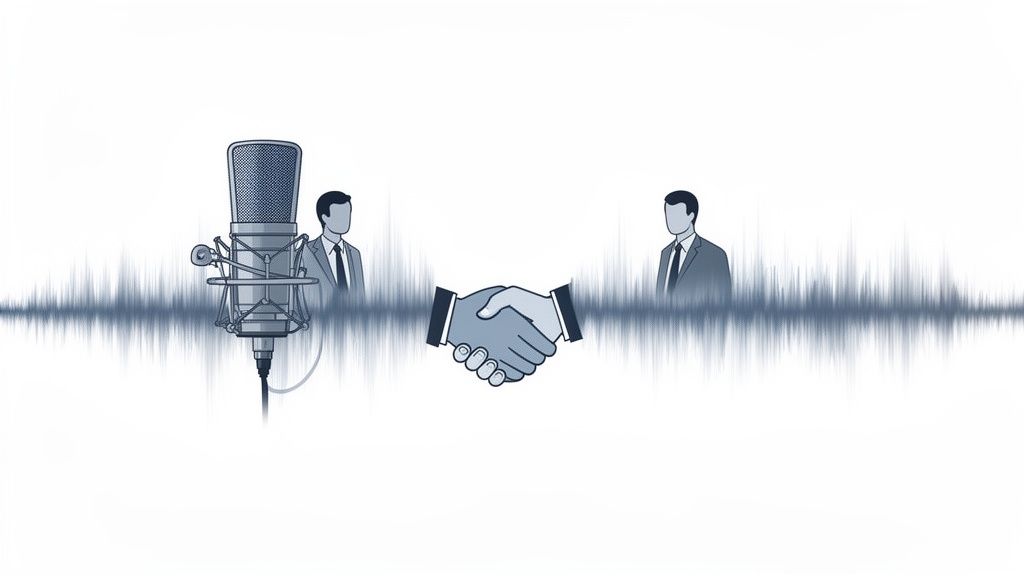
Professional audio recording for podcasts is your handshake, your business card, and your first impression all rolled into one. For B2B brands, where credibility is currency, delivering crystal-clear sound isn't a luxury—it's the fundamental price of entry for earning a listener's attention and trust. Anything less risks them tuning out before they ever hear your valuable message.
Why Your Audio Is Your Brand's Voice
In the crowded world of B2B content, your podcast audio is a direct reflection of your brand's professionalism.
Think of it this way: you wouldn't show up to a high-stakes client meeting in a wrinkled shirt. Presenting your expertise through muffled, tinny, or echo-filled audio sends the exact same message—that you don’t value quality.
Listeners make snap judgments. Poor audio quality is jarring and creates what's known as listening fatigue. It forces the brain to work harder to decipher the words, making the whole experience unpleasant. This is especially true in B2B, where your audience is often busy professionals trying to listen during a commute or while multitasking. If you make it hard work, they'll simply switch off.
"Great audio is more important than great video, so if you have to choose one, go with audio. People can put up with lower quality video, but low quality audio is jarring and they will tune out."
The Unspoken Impact of Sound Quality
High-quality audio does more than just keep listeners from hitting "skip." It builds subconscious trust. When your audience hears a warm, present, and clear voice, it signals authority and confidence. This "audio branding" is non-negotiable for establishing your company as a thought leader.
The difference is night and day:
- Poor Audio: Sounds distant, amateurish, and untrustworthy. It can make even the most brilliant guest sound unprepared.
- Professional Audio: Conveys expertise, polish, and respect for the listener's time. It creates an intimate, engaging experience that holds attention.
The good news? Achieving this standard is more accessible than ever. You don't need a six-figure recording studio to produce broadcast-quality sound.
Tapping into a Growing Market
The opportunity for B2B companies in audio is massive and getting bigger by the day. The podcast industry is exploding, with its market value projected to skyrocket from $39.63 billion in 2025 to $131.13 billion by 2030.
This surge shows that audio is a scalable and highly effective channel for building authority. For brands, this growth means a larger, more engaged audience is just waiting to be captured with high-quality content.
Ultimately, investing in excellent sound is an investment in your brand's reputation. It’s a core element that defines what makes a podcast good and sets the stage for every other part of your show's success, from landing great guests to growing your audience.
Building a Practical Podcast Recording Setup
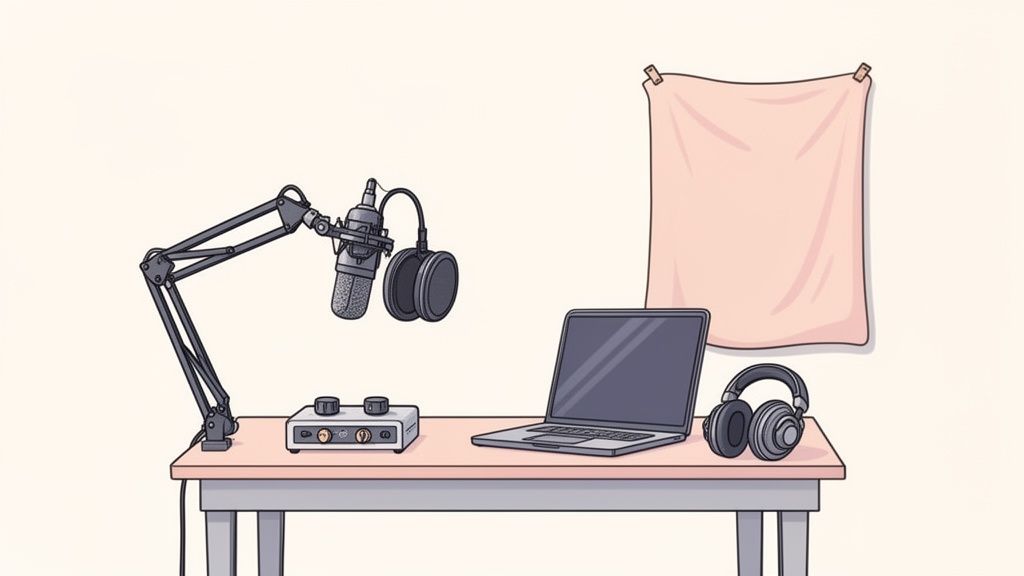
Let's get one thing straight: you don't need a professional studio to get professional audio recording for podcasts. In fact, the single biggest improvement you can make to your sound has nothing to do with expensive gear. It’s all about the room you're in.
I’ve seen it time and time again—a pricey microphone in a room with bare walls and hardwood floors will always sound worse than a cheap mic in a well-treated space. Before you spend a dime, find a quiet spot. A walk-in closet packed with clothes, a carpeted bedroom, or any room with heavy curtains are great starting points. These soft surfaces are your best friends; they absorb sound and kill that distracting, amateur-sounding echo.
Your Microphone: The Heart of Your Setup
Once you've sorted out your space, the microphone is your next priority. This is where your investment will have the most impact on your sound. Your main decision will be between a dynamic and a condenser microphone.
Dynamic Microphones: Think of mics like the Samson Q2U or the legendary Shure SM58. These are workhorses, built to thrive in less-than-perfect environments. They're less sensitive and designed to capture sound directly in front of them, which means they do a fantastic job of rejecting background noise like a humming AC unit or traffic outside. For most home-based B2B podcasters, a dynamic mic is a no-brainer.
Condenser Microphones: Mics like the Blue Yeti or Rode NT1 are more sensitive and capture a much richer, more detailed sound. While they can make a voice sound absolutely incredible, they also pick up everything. Every keyboard click, every creak of your chair, every bit of echo in your room. Use these only if you have a truly silent, acoustically treated space.
For the vast majority of B2B shows just getting started, a quality USB dynamic microphone is the simplest and most reliable path to great audio. For a complete breakdown, check out our b2b podcast equipment guide.
Beyond the Mic: Essential Audio Gear
While the microphone gets all the glory, a few other pieces of gear are non-negotiable for a clean, professional sound. My advice? Keep it simple. Every extra cable or piece of hardware is just another potential point of failure.
If you opt for an XLR microphone (the kind with the three-pin connector), you'll need a user-friendly audio interface like a Focusrite Scarlett 2i2. This little box converts the analog signal from your mic into a digital signal your computer can understand. It also gives you physical knobs to control your recording levels, which is incredibly useful.
One critical, non-negotiable piece of gear: wired headphones. Ditch the Bluetooth. Wireless headphones can introduce a tiny delay (latency) that makes it impossible to monitor your audio in real-time. With wired headphones, you hear exactly what the microphone is capturing, the moment it captures it. This is how you catch plosives or background noise before they ruin a great take.
Finally, a pop filter or foam windscreen is a small accessory that makes a huge difference. It clips onto your mic stand and diffuses the harsh puffs of air from "p" and "b" sounds (plosives), saving your listeners from those jarring pops in the final recording.
Choosing Your Gear: A Practical Comparison
To make things easier, I've put together a quick comparison of equipment options for different budgets. The goal here isn't to buy the most expensive gear, but to find the right balance of quality, reliability, and simplicity for your B2B podcasting goals.
For a deeper dive, you can check out our complete podcast setup and equipment list to see how all these components work together.
Essential Podcast Gear Comparison for B2B Creators
Here’s a breakdown of recommended gear, from good-enough to best-in-class. Notice how even the "budget" column can deliver fantastic results.
The key takeaway? You can get broadcast-quality sound without breaking the bank. The "Good" column represents a rock-solid, great-sounding setup for under $150. As your show grows, you can always upgrade, but the fundamentals of a good recording space and solid mic technique will always matter more than the price tag on your gear.
Mastering Remote Recordings With High-Profile Guests
In the world of B2B podcasting, geography should never hold you back. Let's be honest, remote recording isn't just a nice-to-have anymore; it's a strategic advantage. It blows the doors wide open, giving you access to a global pool of high-profile guests who would otherwise be impossible to book.
Think about it: no travel costs to reimburse, no studio fees, and way fewer scheduling headaches. This makes it so much easier for a busy industry leader to say "yes" to your interview request. The real key, though, is having a bulletproof, repeatable workflow for your remote audio recording for podcasts. Great audio is always non-negotiable. With the right tools and a bit of prep, you can capture studio-quality sound from literally anywhere on the planet.
Your goal is to make the tech completely invisible for both you and your guest, so the conversation can be the star of the show.
Setting Guests Up for Success
One of the biggest things that keeps podcasters up at night is relying on a guest's tech setup. You can't control their home office, but you absolutely can guide them toward a better outcome. A simple, non-technical prep guide works wonders here.
Keep your pre-interview communication clear, concise, and focused only on what actually matters. Here’s an actionable checklist you can send to every guest:
- Find a quiet space. A small, carpeted room with soft stuff (like a bedroom or a home office with a rug) is perfect for killing echo.
- Use wired headphones. Seriously, emphasize this. Even the basic earbuds that come with a smartphone are a million times better than Bluetooth. They are absolutely crucial for preventing audio feedback and those awkward latency issues.
- Good lighting is simple. If you're recording video, just ask them to sit facing a window. Natural light is your best friend and makes a huge difference.
- Close unnecessary apps. This is a big one. Quitting other programs frees up their computer's processing power and—most importantly—kills those distracting notification pings.
For a deeper dive into this entire process, check out our guide on how to record podcasts remotely, which breaks down the whole workflow.
The Power of Local Recording Platforms
The real game-changer for remote audio quality is using a platform that records each person's audio and video locally. This is huge. It means your recording quality isn't at the mercy of a spotty internet connection.
We point people toward our partner, Riverside.fm, for this exact reason. Their whole platform is built to capture separate, high-fidelity audio and video tracks directly from each person's computer. So, even if someone's internet drops or stutters mid-sentence, their individual recording stays pristine and completely unaffected. It’s the closest you can possibly get to an in-person studio experience without anyone having to leave their desk.
A common worry is that guests won't have the right gear. If your budget allows, sending a quality, affordable microphone like a Blue Yeti is a fantastic touch. It not only guarantees great audio but shows your guest you're serious about making them sound their best. For more on this, read our guide on how to prepare for your next podcast guest appearance.
This kind of strategic investment in your remote recording setup pays off big time. It's a key reason why B2B brands are having so much success with podcasts right now. High listener engagement makes audio a powerhouse for demand generation, where that sustained attention builds deep, lasting brand recall. By 2026, weekly podcast listeners in the U.S. will average 6.3 hours per week, with 34% of Americans tuning into 8.3 episodes weekly.
Your Pre-Flight Host Checklist
Getting your guest prepped is only half the battle. To make sure every session runs like clockwork, you need your own pre-recording ritual.
- Test Your Own Gear: Never, ever assume your setup is working. Do a quick test recording just a few minutes before the guest joins to check your mic, headphones, and software settings.
- Restart Your Computer: A fresh reboot clears your system's memory and dramatically reduces the chances of a random technical glitch mid-interview.
- Prep Your Questions: Have your notes and outline ready to go in a separate window or on another screen. This lets you guide the conversation naturally without the sound of you clicking and typing.
- Silence All Notifications: Turn on "Do Not Disturb" on your computer and put your phone on silent. Eliminate every single potential interruption before it happens.
Once you master this remote recording workflow, you turn a potential technical headache into your single greatest asset for booking top-tier guests and producing consistently professional audio.
Technical Best Practices for Flawless Recording Sessions
Once you've got your gear sorted, it's time to master the technical side of recording your podcast. This is where you elevate your show from sounding "pretty good" to genuinely professional.
The best part? The most impactful techniques are free and, once you get the hang of them, they'll become second nature.
Mastering Your Microphone and Levels
Let's start with the basics: how you use your mic. Proper technique costs nothing but makes a world of difference.
First, positioning. Aim to be about one hand-span away from the microphone—roughly 4-6 inches. If you get too close, you'll trigger the "proximity effect," which creates that boomy, overly bass-heavy sound. Too far, and you'll sound thin and distant, forcing the mic to pick up more of the room's natural echo.
Here’s a pro tip: don't speak directly into the front of the mic. Instead, angle it slightly off-axis, about 10-45 degrees, so you're speaking just past it. This simple adjustment dramatically cuts down on plosives—those harsh "p" and "b" sounds that cause ugly pops in your audio—without having to rely entirely on a pop filter.
Key Takeaway: Consistency is everything. Your goal is to keep the same distance and angle from the mic for the entire recording. This discipline is what prevents those distracting volume jumps and gives your audience a smooth, easy listening experience.
Next up is setting your gain, or input level. This is arguably the most critical step. You want to record a strong, clear signal without it being so loud that it "clips" and distorts.
On your recording software's meter, your voice should consistently peak between -12dB and -10dB. This is the sweet spot. It gives you plenty of headroom, ensuring your audio is clean and can be easily mixed in post-production without any risk of digital distortion.
Your Signal Chain and Monitoring
"Signal chain" sounds intimidating, but it's just the path your voice takes to get recorded.
- USB Mic Setup: Your Voice → Microphone → USB Cable → Computer.
- XLR Mic Setup: Your Voice → Microphone → XLR Cable → Audio Interface → USB Cable → Computer.
Knowing this path is your first step in troubleshooting. If something isn't working, you just check each connection one by one. The golden rule here? Keep it simple. As Fame's founder Tom Hunt always says, every extra piece of gear is another potential point of failure. Reliability is king.
This is a great, simple visualization of the entire recording workflow.
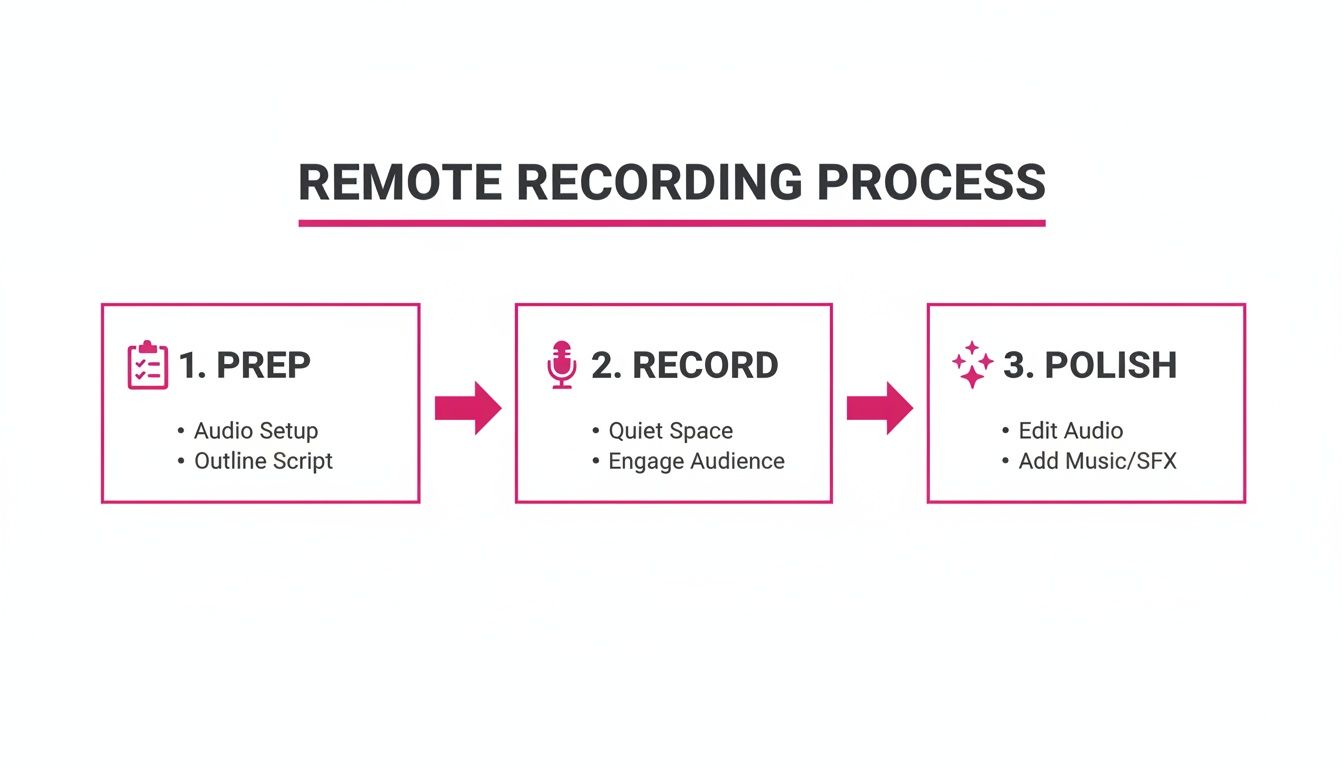
It really drives home that a great recording isn't just about hitting "record." The prep and the post-production are just as vital.
One last thing: monitoring your audio with wired headphones is non-negotiable. It lets you hear exactly what the mic is picking up, as it happens. You'll catch that annoying background hum or those plosives during the recording, not after you've wasted an hour capturing unusable audio.
Common Issues and Quick Fixes
Even with the best prep, things go wrong. Here's a quick cheat sheet for the most common audio gremlins.
- Problem: Annoying Hum or Buzz. This is almost always electrical interference or a ground loop. Try plugging your gear into a different power outlet. Better yet, plug everything (computer, interface, etc.) into the same power strip. Also, make sure your audio cables aren't running right alongside power cables.
- Problem: Echo and Reverb. This is a room problem. You're surrounded by hard, reflective surfaces like bare walls and hardwood floors. The quick fix is to soften the space. Move to a carpeted room, hang some blankets, or—the classic podcaster hack—record in a walk-in closet full of clothes.
- Problem: Background Noise. This could be anything from your AC unit to street traffic. Your best defense is a dynamic microphone, which is great at rejecting sound from the sides. The other, simpler defense? Just turn off any noisy fans or appliances before you start.
Nailing these technical details is a massive step forward. If you're ready to go even deeper, our full guide on how to produce a podcast walks you through the entire process, from A to Z.
Your Post-Production Workflow for Polished Episodes
That feeling when you hit the stop button? Fantastic. But let’s be honest, the real work of making an episode truly great is just getting started. Your post-production workflow is what turns those raw audio files into a crisp, professional listening experience that hooks your audience. For a B2B podcast, getting this process nailed down is how you maintain quality and consistency, episode after episode.
First things first: get your digital house in order. Whether you're recording by yourself or with a handful of remote guests, create a dedicated folder for every single episode.
Adopt a logical naming convention right away. Something like Episode_012_Host_Tom_RAW.wav and Episode_012_Guest_Jane_RAW.wav works perfectly. This tiny habit will save you from monumental headaches later on. Trust me.
Foundational Editing for Clarity and Pace
With your files neatly organized, it’s time for the first pass—the foundational edit. The goal here isn’t perfection. It's about creating a clean, coherent conversation. This is where you'll slice out the major mistakes, the awkward long pauses, the distracting "ums" and "ahs," and any conversational detours that went way off-topic.
Listen through the whole recording from start to finish, making cuts to tighten the flow and improve the pacing. You want to make the conversation more focused and, frankly, more respectful of your listener's time. For a much deeper dive into the specific tools and techniques, check out our complete guide on how to edit a podcast.
A pro tip here is to generate a transcript. Using a guide to master your AI audio to text transcription can seriously speed up this part of the process. A written version of your episode makes it way easier to spot areas that need a trim and gives you ready-made content for show notes.
Mixing and Mastering for That Pro Finish
Once you have a solid content edit, you move on to mixing and mastering. These are the technical steps that separate the amateurs from the pros, giving your podcast that polished, broadcast-ready sound.
Mixing: This is all about balance. You’ll be adjusting the audio levels of every track—the host, the guest, the intro music, you name it—to make sure they all sit together nicely in the final product. The idea is to create a cohesive mix where no single element is jarringly loud or frustratingly quiet.
Mastering: This is the final coat of polish. In mastering, you apply effects like compression and equalization to the entire mixed track. This step ensures a consistent volume level throughout the whole episode and makes the audio sound rich and clear, no matter if someone's listening in their car or on a pair of earbuds.
Mastering isn't just about making it sound good; it's about making it sound right. Most major platforms like Spotify and Apple Podcasts normalize audio to a loudness standard of around -14 LUFS (Loudness Units Full Scale). Hitting this target ensures your podcast sounds just as loud and present as all the other professional shows out there.
Adding the Final Touches
The last piece of the puzzle is adding all the elements that give your show its identity. We're talking about your intro and outro music, any mid-roll ads or sponsor messages, and any sound effects you use to transition between segments.
Placing these elements strategically does more than just top and tail your content; it frames the entire experience and reinforces your brand. A punchy intro or a smooth musical transition can instantly elevate the perceived quality of your show.
This structured workflow—organize, edit, mix, and finalize—is your blueprint for producing high-quality audio recording for podcasts without losing your mind. By turning these steps into a repeatable system, you ensure every single episode you ship meets the high standard your brand deserves.
When to Outsource Your Podcast Production
Let's be honest. Juggling every single part of your podcast—from lining up guests to mastering the final audio—can feel like a full-time job. It’s because it is a full-time job.
Going the DIY route is a fantastic way to get your feet wet. But there’s a tipping point where it stops being a smart use of your team’s time. This is where you have to stop thinking about it as an expense and start thinking about opportunity cost.
The real question isn't just, "Can we handle this ourselves?" It's, "What critical business activities are we ignoring because we're sinking hours into production?" Every hour your team spends wrestling with audio hiss or chopping out "ums" is an hour they aren't spending on sales calls, product demos, or core marketing work that actually moves the needle.
Thinking in Terms of ROI
Bringing in a specialized B2B podcast production agency isn’t just about handing off tasks. It’s a strategic move to boost both efficiency and quality. A dedicated crew of audio engineers, producers, and marketers brings a level of polish and know-how that’s incredibly tough (and expensive) to build from scratch in-house.
"The aim is to help B2B companies grow, and a podcast is one of the most effective ways to do that. Our job is to remove all the friction so our clients can focus solely on sharing their expertise." - Tom Hunt, Founder of Fame
This kind of partnership turns your podcast from a time-suck into a well-oiled content machine. An expert team can take everything off your plate, from booking high-profile guests to making sure your final audio recording for podcasts sounds like it belongs on the radio, all while guaranteeing performance metrics like monthly download growth.
Turning Your Audio Into a Marketing Asset
A professionally produced podcast isn't just an audio file; it's a powerful brand asset that can fuel your entire marketing strategy. Once you've got a polished episode in hand, you're sitting on a goldmine of content ready to be sliced, diced, and repurposed.
A great production partner doesn't just email you an MP3 and call it a day. They help you squeeze every drop of value from that content across other channels. This integrated approach is where the real magic happens, ensuring your investment in top-tier audio delivers a return you can actually measure. For example, clips can be used by a B2B social media agency to promote the episode, while transcripts can fuel a B2B email newsletter agency for weeks.
So, When Is It Time to Make the Call?
You should seriously consider outsourcing when you hit one of these all-too-common walls:
- You're Drowning: Your team is constantly behind on production deadlines, and you can hear the quality slipping.
- You've Plateaued: Your download numbers have flatlined, and you're out of ideas for reaching a bigger audience.
- You've Become a Tech Support Team: You spend more time troubleshooting audio glitches than you do creating compelling content.
- You Need to Prove Its Worth: The podcast needs to start pulling its weight in lead generation, and you need a real strategy to show ROI.
If any of these sound painfully familiar, it's probably time to look into professional B2B podcast production services. Outsourcing gives you your time back so you can focus on what you do best—running your business—while a team of pros makes sure your podcast becomes a cornerstone of your brand's authority and growth.
Common Questions About Podcast Audio
Even with the best plan in place, a few questions always seem to bubble up as B2B brands get serious about their sound. Let's dig into some of the ones we hear all the time.
How Much Does It Really Cost to Get Good Podcast Audio?
This is the big one, and the answer is probably a lot less than you think. You don't need to break the bank to sound like a pro.
A fantastic, rock-solid starter setup will only set you back $150-$250. Seriously. For that, you can get a quality USB dynamic mic (like an Audio-Technica ATR2100x-USB), a decent pair of wired headphones, and a pop filter. These pieces give you the biggest bang for your buck by far.
When you're ready to step up your game, a more advanced rig with an XLR microphone and an audio interface might run you somewhere between $400-$700. To get more specific ideas, explore our guides on the equipment needed for a podcast.
Can I Just Use My Laptop or Phone Microphone?
Look, for a B2B podcast where your brand's credibility is on the line every single episode, this is a hard "no" from us.
Here's why: those built-in mics are omnidirectional. They're designed to pick up everything—your voice, the echo in the room, your frantic keyboard clicks, the dog barking down the hall. The result is a distant, amateurish sound that instantly undermines your authority.
Investing in even a basic external microphone makes a night-and-day difference. It puts your voice front and center, making you sound present, clear, and in control.
What Is the Single Most Important Factor for Good Audio?
Easy. Your recording environment. This is the secret that separates the amateurs from the pros, and it’s something most new podcasters completely overlook.
An expensive microphone in an echoey room with hard surfaces will always sound worse than a budget microphone in a well-treated space. Your number one priority should be finding a quiet room with soft surfaces that absorb sound.
Think walk-in closets packed with clothes, a carpeted bedroom with heavy curtains, or even a makeshift blanket fort. No joke. Taming your space is a free or dirt-cheap step that yields the most significant improvement you can make. It makes every other part of your podcast production workflow smoother and more effective.
Ready to turn your podcast into a powerful growth engine without the production headaches? At Fame, we handle everything from pristine audio engineering to strategic promotion, guaranteeing results for B2B brands. Learn more about our B2B podcast production services.