November 1, 202518 min read5 sections
Your Actionable Guide To Podcast Setup Equipment
By Fame Team
Key Takeaways
- Investing in high-quality audio equipment is crucial for a successful podcast, as listeners are more likely to forgive poor video quality than bad audio.
- A podcast's core setup should include four key pieces of gear, and focusing on these components ensures a professional-sounding listening experience that respects the audience's time and attention.
- Great audio is more important than great video, and a weakness in audio quality can compromise the entire recording, making it essential to prioritize audio-first when setting up a podcast.
Your journey into podcasting starts with a simple, brutal truth: listeners will forgive subpar video, but they will never forgive bad audio.
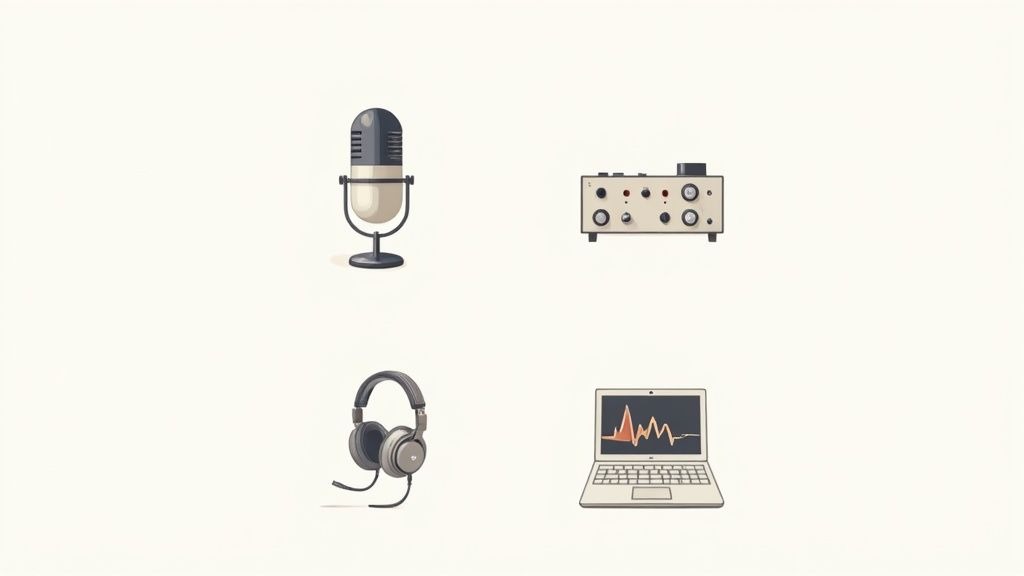
The soul of any great show is built on clean, clear sound, which all comes down to your essential podcast setup equipment. Don't worry, this isn't as complicated as it sounds. Your foundational kit really just boils down to four key pieces of gear.
Building Your Core Podcast Setup
Before you even think about specific models or brands, you need to fully embrace an "audio-first" philosophy. Your voice is the primary connection you have with your audience. If it’s muffled, distant, or full of distracting background noise, people will tune out. Fast.
Crisp, professional sound establishes credibility from the very first second of your very first episode.
This holds whether you're a solo creator recording in a walk-in closet or a B2B brand building out a dedicated studio. The goal isn't to spend a fortune, but to invest smartly in the gear that delivers the biggest impact on how you sound. Focusing on these core components ensures you create a listening experience that respects your audience's time and attention.
To get a clearer picture of what you'll need, let's break down the essential equipment. Think of this as your starting lineup for producing professional-quality audio.
Core Podcast Equipment at a Glance
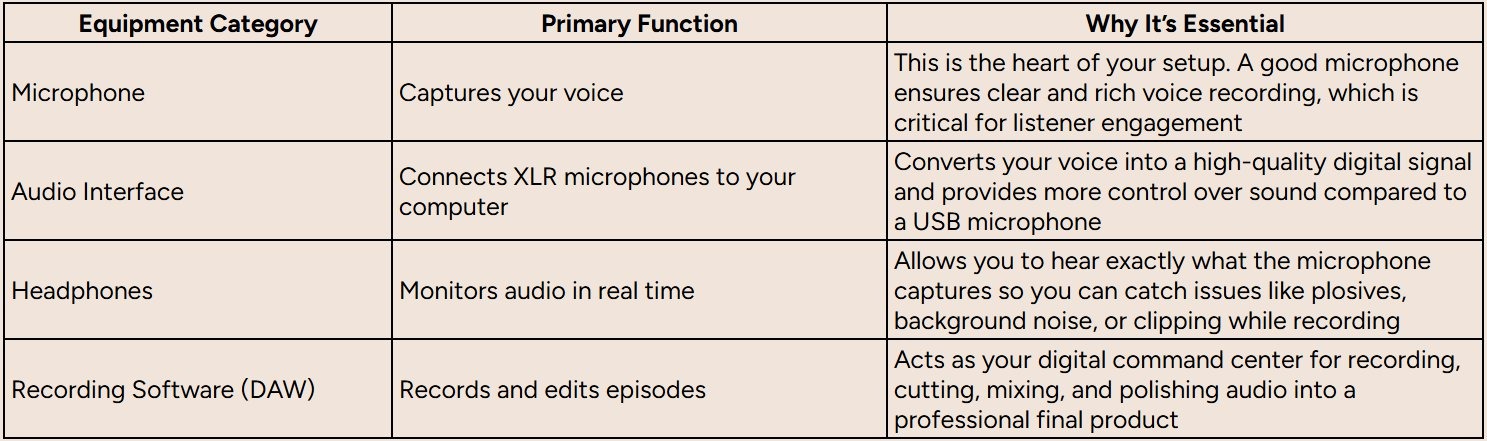
Each of these components plays a critical role. A weakness in one area can compromise your entire recording, so it pays to get the fundamentals right from the start.
"Great audio is more important than great video, so if you have to choose one, go with audio. Lighting, the right clothing, etc., can make up for poor video. People can put up with lower quality video, but low quality audio is jarring, and they will tune out."
The growing emphasis on quality isn't just anecdotal; it's reflected across the entire industry. The global podcasting hardware market was recently valued at around USD 3.6 billion and is projected to grow at a compound annual rate of 22.8% over the next decade. Everyone is leveling up their sound.
This guide will give you a clear roadmap for selecting the right gear, helping you make informed decisions that will serve your show for years to come. For a broader overview, you can also check out our guide on what you need for a podcast.
Choosing the Right Microphone for Your Voice
Let’s be clear: your microphone is the single most important piece of gear in your podcasting setup. It’s the very first link in the chain, the tool that captures your voice and turns it into something your audience can connect with. If you get this one decision right, you’re already halfway to a professional-sounding show.
The first big question you need to answer is whether to go with a USB or an XLR microphone. I like to think of it as the difference between a great point-and-shoot camera and a more complex, but far more versatile, DSLR.
The USB vs. XLR Decision
A USB microphone is the definition of plug-and-play. You take it out of the box, plug it into your computer’s USB port, and you’re ready to record. All the complicated bits are handled internally. This makes it a fantastic starting point for solo podcasters who want to keep things simple and affordable.
An XLR microphone, on the other hand, is what the pros use. It connects using a beefy three-pin cable and needs a separate piece of hardware, an audio interface or a mixer, to talk to your computer. While that sounds like more hassle (and it is, a little), it gives you much better sound quality, durability, and the freedom to upgrade your setup piece by piece down the road.
Action Step: Choose a USB mic for simplicity and budget if you're a solo host. Opt for an XLR mic if you prioritize top-tier audio quality and plan to have multiple in-person guests in the future.
Dynamic vs. Condenser Mics: Your Room is the Deciding Factor
Beyond how you connect it, the next choice is about how the microphone actually hears the world. For podcasting, this boils down to two main types: dynamic and condenser.
- Dynamic Microphones are incredible at ignoring background noise. They are less sensitive by design and are built to capture only what’s directly in front of them. This makes them a lifesaver for anyone recording in an imperfect space, like a home office with a humming computer or a bedroom that hasn't been soundproofed. Mics like the Rode Procaster or the legendary Shure SM7B are industry workhorses for exactly this reason.
- Condenser Microphones are the opposite. They are incredibly sensitive, designed to pick up every little nuance and detail in your voice with sparkling clarity. The downside? They also pick up every echo, every air conditioner hum, and every car that drives by. A condenser mic like the Audio-Technica AT2020 really only sings in a quiet, acoustically treated room.
The golden rule is this: choose your microphone based on your recording environment. An inexpensive dynamic mic in a noisy room will always sound better than a high-end condenser mic in that same space.
This is a huge deal. You're not just buying a microphone; you're buying the right microphone for your specific room. Our full guide on the essential equipment needed for a podcast goes into more detail on how all these pieces fit together.
Our Top Microphone Recommendations
Sifting through all the options out there can be exhausting. To cut through the noise, here are a few mics that I and countless other podcasters have relied on. They’re proven performers at different budget levels. And if you want to do an even deeper dive, check out this great rundown of the best microphones for podcasting in 2024.
For the Beginner (Under $100)
The Samson Q2U is, without a doubt, the best entry-level podcasting mic out there. It’s a dynamic mic that sounds fantastic, is built like a tank, and, this is the brilliant part, has both USB and XLR outputs. This dual-connectivity means you can start by plugging it straight into your computer, and when you’re ready to upgrade to an audio interface, you don’t have to buy a new mic. It grows with you.
The Prosumer's Choice (Under $400)
The Rode Procaster is an absolute favorite in the podcasting world. It’s a dynamic XLR mic that delivers that rich, warm, "broadcast" vocal tone. Its built-in noise rejection is top-notch, making it a perfect choice for home studios where you can't control every little sound.
The Industry Standard
The Shure SM7B is the mic you see everywhere, from Joe Rogan’s studio to The Diary of a CEO. It’s a legendary dynamic XLR mic that has an almost magical ability to make any voice sound smooth and professional. It's famous for rejecting off-axis sound, meaning it captures you and pretty much nothing else. It’s a serious investment, but its performance and bulletproof build quality mean it’s the last vocal mic you’ll ever need to buy.
Making Sense of Audio Interfaces and Mixers
If you've decided to level up your sound with a professional XLR microphone, you've unlocked the need for one more crucial piece of gear: the audio interface.
Think of it as the translator between your high-quality analog microphone and your digital computer. It’s the magic box that takes the pure analog signal from your mic and converts it into a crystal-clear digital format your recording software can actually understand.
But this device is more than just a fancy adapter. It’s a specialized preamplifier that gives your microphone the clean power it needs to operate at its peak, and it’s where you’ll find essential controls to command your sound.
Key Terms You Need to Know
When you start browsing for an interface, you'll run into terms like "gain" and "phantom power." Don't let the jargon intimidate you; they're simple concepts that are absolutely critical for getting great audio.
- Gain: This is basically a volume knob for your microphone. It boosts the mic's signal to a healthy, usable level for recording. Setting the right gain is everything, too low, and your audio will be quiet and full of hiss; too high, and it will distort (or "clip"), a problem that’s nearly impossible to fix later.
- Phantom Power (+48V): Many condenser microphones need a small electrical charge to work their magic. An audio interface provides this with the simple push of a +48V button. If you have a condenser mic, you absolutely need an interface with phantom power.
Interfaces like the wildly popular Focusrite Scarlett series are perfect for solo podcasters or shows with one co-host. They typically offer one or two high-quality microphone inputs, a headphone jack for monitoring your audio in real-time, and a simple USB connection to your computer. For most podcasters, a solid two-channel interface is all you’ll ever need.
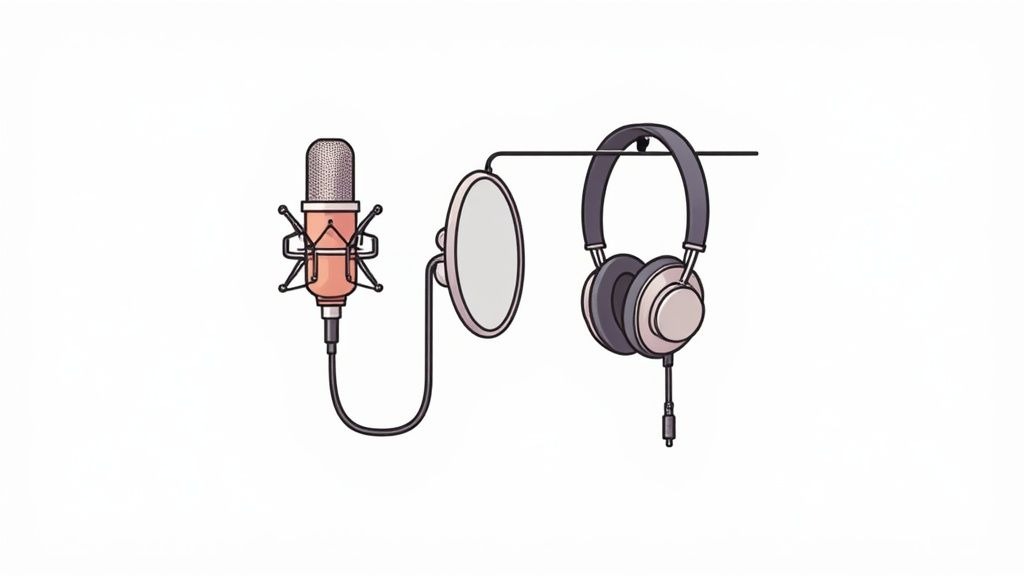
This quick visual guide can help you figure out which type of microphone is right for your space, which in turn determines if you need an interface with phantom power.
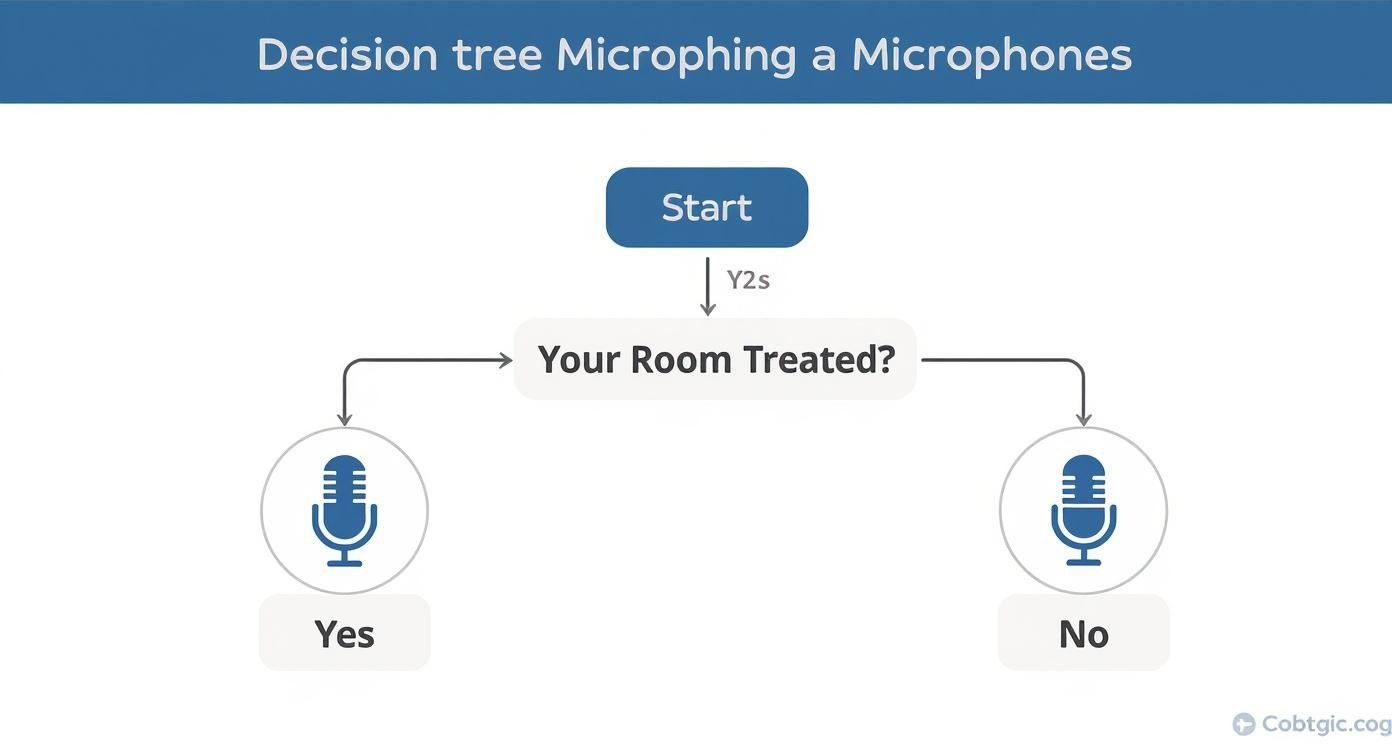
The takeaway here is that your recording environment directly impacts your microphone choice, which then dictates your need for an audio interface.
When to Graduate to a Mixer
So, if an interface handles the essentials, why would anyone need a bigger, more complex device like a mixer? It all comes down to control and the number of inputs you need.
An interface is a simple bridge. A mixer is more like a command center for your audio.
You should seriously consider upgrading from an interface to a mixer if:
- You regularly host multiple in-person guests. Mixers typically offer four or more microphone inputs, each with its own dedicated set of controls.
- You want to incorporate live elements. A mixer makes it easy to bring in audio from other sources in real-time, think a phone call from a remote guest, sound effects from a tablet, or intro music.
- You need on-the-fly audio adjustments. With physical faders and knobs for each channel, you can adjust volumes, apply effects, and balance the sound of multiple speakers during the recording itself. This can save you a ton of time in post-production.
The market has adapted to this demand perfectly, with podcast-specific production studios like the Rodecaster Pro II becoming incredibly popular. These all-in-one devices combine the functions of a mixer, an audio interface, and a recorder into one user-friendly package.
To make the choice crystal clear, here’s a quick breakdown of where each device shines.
Audio Interface vs Mixer: Which Do You Need?
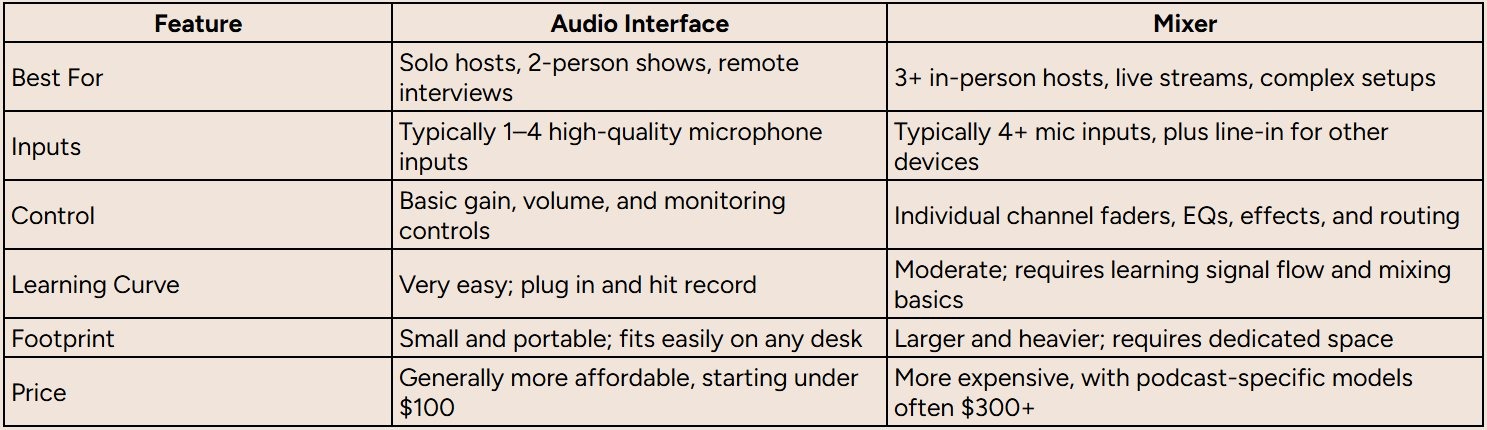
Action Step: Buy a two-channel audio interface if you plan to record alone or with one other person. Upgrade to a mixer or podcast production studio only when you need to record three or more people in the same room.
Choosing the right device from the start will allow your show to scale without forcing you to re-buy essential gear down the line. For a deeper dive into how all these components fit together, be sure to read our step-by-step gear guide for podcast equipment.
Essential Accessories That Elevate Your Sound
Alright, you've got a great microphone and a solid interface. That’s the engine of your podcast setup. Now it's time for the little things that turn a good recording into a great one.
These accessories are the unsung heroes of professional-sounding audio. They're often overlooked, but trust me, they solve those small, nagging problems that can completely sabotage an otherwise perfect take. Think of them as your audio insurance policy, relatively cheap additions that protect your bigger investments.
Why Closed-Back Headphones Are Non-Negotiable
If you take only one piece of advice from this entire guide, let it be this: you absolutely must wear wired, closed-back headphones while you record. Monitoring your audio in real-time is the only way to catch problems before they become editing nightmares.
There are a few huge reasons this is so critical:
- Hear What Your Mic Hears: Headphones let you hear exactly what your microphone is capturing, as it happens. You'll instantly notice if you're leaning too close and getting boomy, if your gain is too hot and clipping, or if the AC just kicked on.
- Kill the Mic Bleed: Closed-back headphones are designed to keep sound in. This is crucial. It stops the audio from your co-host from leaking out of your headphones and into your own mic, which creates a faint, ghostly echo that's a beast to edit out.
- Dodge the Latency Bullet: Always, always choose wired headphones. Bluetooth introduces a tiny delay (latency) between when you speak and when you hear yourself, and it’s just enough to be disorienting and completely throw off your natural speaking rhythm.
Action Step: Immediately purchase a pair of wired, closed-back headphones like the Sony MDR-7506 or Audio-Technica ATH-M20x. Use them for every single recording session without fail.
Taming Plosives with a Pop Filter
Ever listen back to a recording and hear a harsh, bassy "pop" on every 'P' and 'B' sound? Those are called plosives. They happen when a burst of air from your mouth slams into the microphone's diaphragm.
The fix is simple and cheap: a pop filter. It’s just a small screen (either mesh or metal) that sits between you and your mic, dispersing that puff of air before it can wreck your audio.
In our experience, a pop filter is one of the highest-impact, lowest-cost upgrades you can make to your podcast setup equipment. It's a small detail that makes a huge difference in the listener's experience, preventing jarring audio spikes and giving your voice a smoother, more professional quality.
Using one is dead simple and instantly makes you sound better, saving you the headache of trying to surgically remove each pop in post-production. Most cost less than $30 and clamp right onto your mic stand.
The Power of a Good Boom Arm
A boom arm is so much more than a fancy mic stand; it completely changes your recording workflow. By clamping to your desk, it lets you position your mic perfectly and then just swing it out of the way when you're done. No fuss.
But it’s not just about convenience. A good boom arm delivers two massive audio upgrades:
- Perfect Mic Placement: It holds the microphone exactly where you need it, ensuring you maintain a consistent distance from your mouth. This is the secret to steady, predictable audio levels.
- Vibration Isolation: Getting the mic off the desk is a game-changer. It isolates it from all the vibrations from you bumping the table, typing on your keyboard, or even just moving your mouse. No more low-frequency rumbles in your recording.
Action Step: Invest in a boom arm like the Rode PSA1+. Clip it to your desk and adjust it so the microphone is about 4-6 inches from your mouth. This simple action will improve your audio consistency and reduce unwanted noise.
Finally, a quick word on XLR cables. If you've gone the XLR route, don't cheap out on the cable. A poorly shielded one can introduce all sorts of frustrating hum and static. Brands like Mogami or Pig Hog make reliable, well-built cables that guarantee a clean signal gets from your mic to your interface. It’s the final bit of polish on a truly professional setup.
How to Set Up Your Recording Space
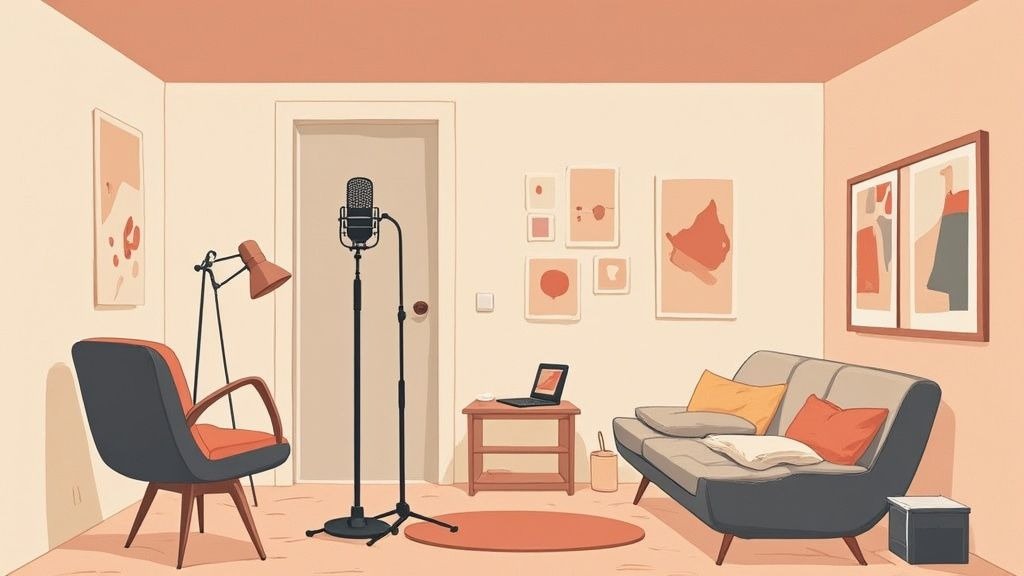
You can have the best podcast setup equipment money can buy, but if your room sounds bad, your show will sound amateur. It’s that simple.
Your recording space is easily the most overlooked and most critical piece of the puzzle. An echoey room with hard, flat surfaces will bounce your voice all over the place, creating a nasty reverb that even the world’s best microphone will pick up.
The good news? You don't need to build a professional sound booth. The goal is to create a sonically 'dead' space, so your microphone only hears your voice, not the room. You can pull this off with stuff you probably already have lying around.
The Power of Soft Surfaces
Think about sound like a bouncy ball. In an empty room with bare walls and hardwood floors, that ball is going to fly everywhere. But in a room packed with pillows, blankets, and rugs? It stops dead in its tracks.
Your voice works the exact same way.
To get an instant upgrade in your audio quality, start adding soft, sound-absorbing materials to your recording area.
- Floors: Got hardwood or tile? Throw down a thick rug. Even a couple of blankets will work wonders. This is the single biggest surface you need to tackle.
- Walls: Hang heavy blankets or duvets on the walls surrounding your desk. You can use temporary hooks or just drape them over chairs and furniture.
- Windows: Glass is a huge culprit for sound reflection. Cover any windows in the room with thick curtains or, you guessed it, more blankets.
This is the whole secret behind the classic "closet studio." A walk-in closet is often the best-sounding room in any house because it's small, oddly shaped, and stuffed with soft, sound-dampening clothes.
Strategic Microphone Placement
Where you put your microphone is just as important as the room itself. The absolute worst spot is usually the dead center of the room, where sound waves converge and create all sorts of weird acoustic problems.
Instead, set up your desk and mic closer to a wall, but not pushed right up against it. This helps kill those early reflections.
Also, be mindful of where your microphone is pointing. Keep it aimed away from noise sources like your computer fan, an AC vent, or a window facing a busy street. Our deep-dive guide on how to record a podcast gets into the nitty-gritty of mic techniques that will make your well-treated space shine.
Your recording environment is more important than your gear. A $70 microphone in a well-treated closet will sound infinitely better than a $400 microphone in a reverberant kitchen.
If you're ready to invest a little, acoustic panels are a fantastic next step. Placing just a few on the walls to your immediate left, right, and in front of you can drastically cut down on echo and give your audio that tight, focused studio sound.
A Quick Note on Video Lighting
Recording a video podcast? Good lighting makes a massive difference. You don't need some complex, three-point lighting setup to look good.
A single, affordable LED panel with a softbox diffuser placed in front of you can wipe out unflattering shadows and give you a clean, professional look.
But never, ever forget the golden rule: audio quality is always more important than video quality. People will put up with a grainy webcam feed, but they will click away in a heartbeat if the audio is harsh and difficult to listen to. Get the room sounding great first. Always.
From Recording to Launching Your Podcast
Alright, you've got your hardware dialed in. Now for the fun part: bringing your podcast to life. The first step on the software side is picking your Digital Audio Workstation (DAW), which is the program where you'll actually record, cut, and polish your episodes.
If you're just starting, don't feel like you need to shell out hundreds of dollars. Some fantastic free tools are more than powerful enough. I always recommend newcomers check out either Audacity or GarageBand. They have everything you need to produce a professional-sounding show, and they're the perfect training ground for learning the fundamentals of audio production.
Editing and Hosting Your Show
Once you've got a few episodes under your belt, you might start looking for ways to speed things up. This is where more modern, user-friendly platforms come into play. AI-powered editors like Descript, for instance, have completely changed the game. It lets you edit your audio just by editing a text transcript, delete a word in the text, and it's gone from the audio. It's an incredible time-saver. Another great partner, the team at Resound, offers an AI podcast editor that helps automate the removal of filler words and silences to save you hours in post-production.
We actually break down the entire post-production process in our complete guide on how to edit a podcast.
And if you want to get really creative, AI is opening up totally new ways to create audio. You can now explore tools to turn text into podcast episodes using AI, which is perfect for repurposing blog content.
Once your episode is edited, mixed, and ready for the world, you need a podcast host. This isn't your website host; it's a dedicated service that stores your audio files and creates the RSS feed that directories like Spotify and Apple Podcasts use. Think of it as the bridge connecting your final MP3 file to your listeners' favorite podcast app.
Promoting Your Podcast for Growth
Getting your show live is a huge milestone, but the real work of building an audience is just getting started. Think of it this way: high-quality audio is the price of admission. A smart promotion strategy is what actually drives growth.
"I run a B2B Podcast Agency, and one thing I always tell our clients is that the launch is just the start. Consistent, targeted promotion is what separates a hobby from a powerful business asset."
- Tom Hunt, Founder of Fame
This is where bringing in specialists can make a massive difference. You've poured all this effort into creating something great; now you need to get it in front of the right people. Using a dedicated B2B Social Media Agency or a B2B Email Newsletter Agency helps you connect with your ideal listeners and turn all that hard work into a genuine business asset.
Common Questions About Podcast Equipment
As you start pulling together your first podcasting rig, you're going to have questions. It's inevitable. Let's tackle some of the most common ones I hear from new creators to get you moving in the right direction.
Do I Need an Audio Interface Right Away?
If you're flying solo, a high-quality USB mic is a fantastic place to start. It's simple, clean, and gets you recording in minutes. Just plug it in and go.
But... if you have any plans to bring on in-person guests or you're chasing that top-tier audio quality, investing in an XLR microphone and an audio interface from day one is the smarter long-term play. It gives you so much more flexibility and room to grow.
What Is the Single Most Important Piece of Gear?
Your microphone. Full stop.
Every piece of your setup matters, but your mic is the one thing that actually captures your voice and turns it into a signal. A great microphone can make a decent room sound good, but a cheap, tinny mic will make even a professional studio sound amateur.
My advice: Always, always put the biggest chunk of your initial budget toward the best microphone you can afford. It's the one place you don't want to cut corners.
The bar for audio quality is only getting higher. The number of global podcast listeners is predicted to hit around 584.1 million soon, with projections climbing to over 651 million within three years. That growth isn't just about more shows; it's about listeners expecting a more polished experience. Better gear is a huge part of that, as you can see from these podcast statistics.
How Much Should I Budget for a Complete Setup?
You can actually get a very solid beginner setup off the ground for around $200-$300. That'll get you a quality USB mic, a good pair of headphones, and a pop filter.
For a more professional, scalable rig, think an XLR mic, audio interface, and a boom arm; you should plan to start in the $500-$700 range. The key is to start with quality essentials you won’t feel the need to replace in six months.
Creating a show that stands out involves more than just great equipment. At Fame, we handle the entire B2B podcast production process for you, from recording and editing all the way to promotion, so you can focus on what you do best: creating amazing content.
Learn how Fame can turn your podcast into a powerful business asset
Want us to run this for you?
Fame starts and grows B2B podcasts that generate pipeline. Tell us who you are trying to reach and we will send a costed proposal within 48 hours.
Related content
- Read moreFame Team · July 16, 2026
10 Account Based Marketing Tactics For B2B Growth In 2026
Discover 10 actionable account based marketing tactics for B2B tech. Learn to use podcasts, data, and targeted content to close high-value accounts. - Read moreFame Team · July 16, 2026
The 8 Best Brighton Podcast Agency Picks For 2026
Find the best Brighton podcast agency for your B2B brand. Our 2026 guide reviews top 8 agencies for production, growth & ROI. Expert analysis here - Read moreJune 10, 2026
20 Best Podcast Production Agencies For 2026 (And Why Should You Hire One)
Global podcast and vodcast ad revenues are on track to hit $5 billion in 2026 , up 20% year-on-year. - Read moreApril 13, 2026
Leadership In Marketing: The B2B Podcast Playbook
Most companies still confuse leadership in marketing with job titles, org charts, and budget control. That's outdated.