
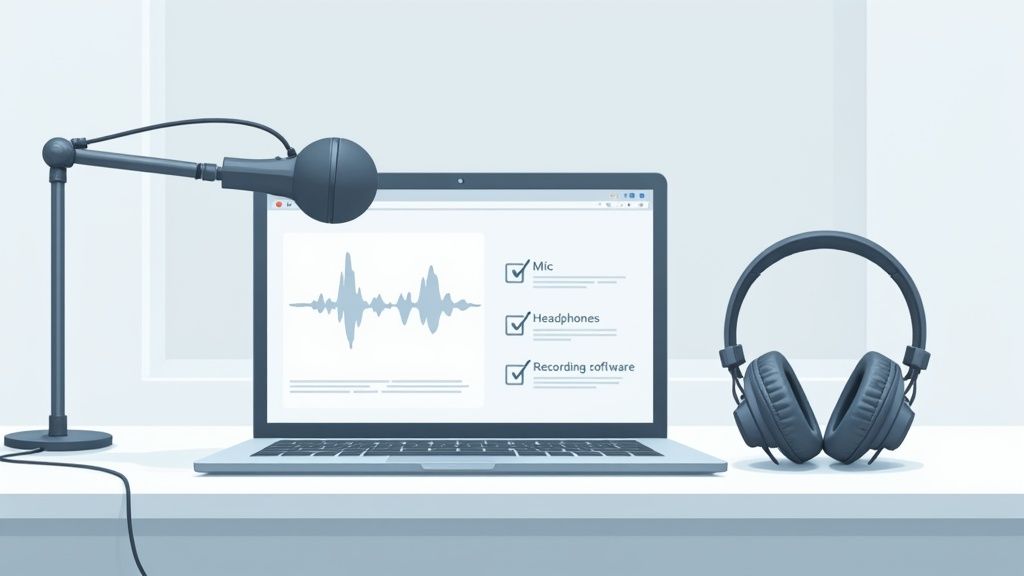
So, you're ready to launch a B2B podcast. Let's cut through the noise. At its core, it boils down to just three actionable items: get a quality microphone, a pair of closed-back headphones, and some intuitive recording software.
That's your foundational kit. It's the absolute minimum podcasting equipment needed to produce audio that sounds clean, professional, and worthy of your brand. As our founder, Tom Hunt, often points out, your audience will forgive a grainy video feed, but they'll hit "stop" in a heartbeat if the sound is distracting and painful to listen to. Great audio is non-negotiable.
Your Foundational B2B Podcast Equipment Checklist
Jumping into B2B podcasting doesn't mean you need to build a broadcast studio worthy of NPR. The journey starts with a simple, focused checklist that prioritizes one thing above all else: audio quality. For a deeper dive into specific gear recommendations, our guide on what you need for a podcast has you covered.
The core principle here is simple but critical. Your voice is the primary vehicle for your company's expertise. If that voice is muffled, tinny, or buried under the hum of your air conditioner, your message gets lost and your brand's credibility takes a direct hit.
The Non-Negotiables for Professional Sound
Your initial setup should be built around these key components that work together to capture, monitor, and record your voice with absolute clarity. Think of it like building a marketing campaign; you start with a clear message and the right channels before you even think about complex analytics.
Here are the absolute essentials for your B2B podcasting equipment checklist:
- A Quality Microphone: This is the single most important piece of gear you will buy. It's the first link in your audio chain and has the biggest impact on how you sound.
- Closed-Back Headphones: These are vital for hearing yourself speak in real-time without any delay. Crucially, they stop sound from your headphones from "bleeding" back into the microphone, which creates a nasty echo that's a nightmare to fix later.
- Recording & Editing Software: This is your digital studio. It's where you'll record the audio, snip out mistakes, and polish your final episode before it reaches your listeners' ears.
“Great audio is more important than great video. Lighting, the right clothing, etc. can make up for poor video. People can put up with lower quality video, but low quality audio is jarring and they will tune out.”
This foundational checklist cuts through the noise and focuses on what actually delivers a professional, brand-enhancing sound from day one. Nail these basics, and you'll be well on your way to building credibility and connecting with your audience through the power of audio.
To put it all in perspective, here's a quick summary of why each piece of core equipment is so important for a B2B show.
Core B2B Podcasting Gear at a Glance
Getting these three pillars right is the first, and most important, step in your podcasting journey.
Choosing Your Microphone and Audio Interface
Let’s get one thing straight: your microphone is the single most important piece of gear in your entire setup. No contest. It’s the direct line between your voice and your listener's ear, and getting this choice right will have a bigger impact on your sound than anything else.
And the market reflects this. The global podcasting hardware market is on a rocket ship, projected to climb from USD 3.6 billion in 2024 to a staggering USD 28.07 billion by 2034. This boom shows just how many businesses are waking up to the power of high-quality audio.
Dynamic vs Condenser Microphones
When you start shopping around, you’ll see two main categories pop up again and again: dynamic and condenser. Both can work, but for a B2B podcaster recording in a typical home office or conference room, one is a much smarter choice.
- Dynamic Microphones: These mics are your best friend in an imperfect room. They’re built to reject background noise, focusing only on the sound directly in front of them. Think of them as specialists, zeroing in on your voice while ignoring the distracting hum of your computer or the traffic outside. They’re forgiving.
- Condenser Microphones: These are the super-sensitive artists of the microphone world. They capture incredible detail and a wide range of frequencies, delivering a crisp, airy sound. But that sensitivity is a double-edged sword—they pick up everything. Echoes, keyboard clicks, the neighbor’s dog... you name it. They really only shine in a purpose-built, acoustically treated studio.
For the vast majority of B2B podcasters, a dynamic microphone is the clear winner. Models like the hugely popular Shure MV7 or the workhorse Samson Q2U give you that clean, isolated, professional vocal sound without needing a soundproof bunker to record in.
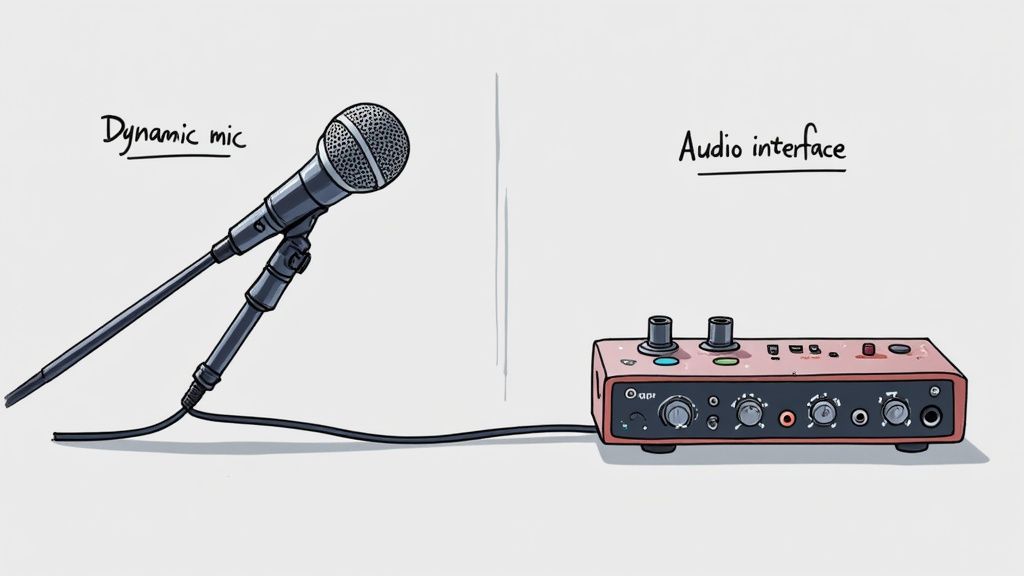
The Role of the Audio Interface
So you’ve picked out a pro-level XLR microphone—the kind with that beefy three-pin connector. Now, how do you get that into your computer? That’s where the audio interface comes in. Think of it as the translator and central hub for your entire audio rig.
An audio interface takes the analog signal from your mic and converts it into a digital signal that your computer can actually record. It’s a massive upgrade from plugging a simple USB mic straight into your machine.
A dedicated audio interface provides cleaner preamps, which boost the microphone's signal with minimal added noise. This results in a richer, clearer, and more professional sound compared to the components found in most computers.
A go-to choice for countless podcasters is the Focusrite Scarlett series. They deliver high-quality preamps, dead-simple controls for setting your volume (gain), and a headphone jack so you can hear exactly what you sound like in real-time. To dig deeper, a definitive guide on the best microphone for podcasting can help you weigh all the options.
Why an Interface is a Smart Long-Term Investment
Going with an XLR mic and an audio interface might feel like an extra step compared to an all-in-one USB mic, but it pays off in spades for any serious B2B show. If you're looking for even more detail, check out our actionable guide to podcast setup equipment.
Here’s why it’s the right move:
- Superior Sound Quality: The preamps inside a dedicated interface are light-years ahead of what's crammed into a USB mic or your computer's motherboard. This means a cleaner, stronger signal with a much lower noise floor.
- Greater Control: Interfaces give you physical knobs to dial in your microphone’s input level (gain). This tactile control makes it infinitely easier to set perfect recording levels and avoid that nasty digital clipping that ruins an otherwise great take.
- Future-Proof Scalability: Started with just you? What happens when you want to bring on a co-host or an in-person guest? A multi-input interface, like the Focusrite Scarlett 2i2, lets you plug in a second mic without a hitch. This flexibility is gold as your show evolves.
Investing in a separate mic and interface creates a high-quality, scalable foundation for your podcast. It makes your brand sound polished and professional from day one and gives you room to grow without having to buy a whole new setup.
Recording and Monitoring Your Audio Like a Pro
Okay, you've got your microphone and interface hooked up. Now for the next critical step: actually recording and hearing what you're doing. You could have the best mic in the world, but if you can't hear what it's capturing in real-time, you're flying blind. This is where a good set of headphones and solid software become absolutely non-negotiable.
This push for quality gear isn't just us being picky; it's a sign of a maturing industry. The global podcasting market is on track to hit nearly $40 billion by 2025, which tells you everything you need to know about its growing professionalism. You can discover more insights on the podcast market from Grandview Research to see just how big this is getting.
Why Closed-Back Headphones Are Essential
Here’s a simple truth: you can't fix what you can't hear. Listening to your audio as it's being recorded is the only way to catch problems—like the air conditioner humming in the background, harsh "p" sounds popping, or someone being too far from their mic—before they completely wreck an interview.
For this job, you need closed-back headphones. Think of industry workhorses like the Sony MDR-7506. They’re perfect because they create a tight seal around your ears, which does two crucial things:
- Sound Isolation: They block out the noise in your room, so all you hear is exactly what your microphone is picking up. This is the only way to get a true sense of your audio quality.
- Preventing Mic Bleed: They keep the sound from your headphones from leaking out and getting picked up by your very sensitive microphone. This stops that distracting, amateurish echo of your own voice from making it into the final recording.
A quick but vital PSA: never, ever use speakers to monitor your audio while recording. Your mic will pick up the sound from the speakers, creating a horrible feedback loop or a persistent echo that is a nightmare to remove later. Just don't do it.
Choosing Your Recording Software
Your recording software, often called a Digital Audio Workstation (DAW), is the command center for your podcast. It's where the signal from your interface gets captured, recorded, and eventually edited. The good news? You don't need to break the bank to get something that works great.
A fantastic starting point for pretty much any podcaster is Audacity. It's completely free, open-source, and has more than enough power to handle all the recording and editing basics for a high-quality B2B show. It might take a little time to get the hang of, but its capabilities are solid.
However, since most B2B podcasts rely on remote guest interviews, specialized tools can be a game-changer. Services like Riverside.fm, one of our partners specializing in high-quality remote recording, were built for this exact scenario. They record each person's audio and video locally—on their own computer—so a dodgy internet connection won't ruin the recording quality. This means your guests will sound just as crisp and professional as you do. For a deeper dive, check out our guide on how to record a podcast effectively.
Hosting and Distributing Your Show
Once you've recorded and polished your episode, the audio file needs a home on the internet. A common misconception is that you upload episodes directly to places like Apple Podcasts or Spotify. That's not how it works. You use a dedicated podcast hosting service.
These platforms are designed to store your big audio files and generate an RSS feed for you. This feed is just a unique link that you submit once to all the podcast directories (Apple, Spotify, etc.). From then on, whenever you upload a new episode to your host, the RSS feed updates automatically, letting all those directories know you have fresh content for your listeners.
Working with a solid host makes this whole process painless. Our partner Captivate, for example, is a platform built by podcasters for podcasters. It simplifies distribution and gives you the analytics you need to understand your audience. This is the final, crucial link in the chain that gets your voice from your desk to the world.
Building Your Podcast Studio On Any Budget
Let's get one thing straight: you don't need a world-class budget to launch a world-class podcast. Not right out of the gate, anyway. The secret is to make smart, incremental investments that actually line up with your marketing goals. Start with a solid foundation and scale up your gear as the show proves its worth.
This tiered approach lets you test the podcasting waters without a massive upfront commitment. Once your show gains traction, you can reinvest with confidence. It's easy to get intimidated by gear, but while the equipment market pulls in around $285-300 million, that's just a sliver of the $30 billion podcasting industry. This tells you that gear is a manageable piece of a much larger content puzzle. For a deeper dive into the numbers, check out the podcast industry's composition here.
To make it practical, we've broken down the essential podcasting equipment needed into three distinct tiers, built specifically for B2B marketing teams.
Comparison Of B2B Podcast Equipment Tiers
To give you a quick lay of the land, here’s a breakdown of the three common setups we see B2B marketers adopt. Each tier builds on the last, adding capability and quality as your commitment to podcasting grows.
Think of these as stepping stones. You can start small, master the basics, and upgrade your kit only when the show’s success demands it.
Tier 1: The Starter Kit (Under $300)
This is your entry point. Perfect for solo hosts, recording a few pilot episodes, or just experimenting with the format without a big financial risk. The name of the game here is simplicity and getting great-sounding audio for a single voice. And it all boils down to one piece of gear: a really good USB microphone.
A quality USB mic like the Rode NT-USB+ or the workhorse Samson Q2U combines the microphone and audio interface into a single plug-and-play device. It delivers crisp, clear audio that blows any laptop or headset mic out of the water, instantly giving your brand a more professional sheen.
Core Components for The Starter Kit:
- High-Quality USB Microphone: A dynamic USB mic like the Samson Q2U is a champ at rejecting room noise, making it perfect for a less-than-perfect home or office space.
- Closed-Back Headphones: Just about any reliable wired headphones will do the trick. You need them to hear yourself and prevent dreaded echo.
- Desktop Mic Stand: Most USB mics ship with a little desktop stand, which is plenty to get you started.
And that’s it. This minimalist rig is all you need to record a solo podcast that sounds fantastic.
Tier 2: The Professional Setup ($500-$1,000)
Okay, your podcast is no longer an experiment—it's a core piece of your marketing strategy. It's time to level up. This tier is designed for shows with a dedicated host, a consistent publishing schedule, and a heavy focus on conducting high-quality remote interviews. The jump to an XLR microphone and a dedicated audio interface is the single biggest leap in audio quality you can make.
An XLR mic plugged into an audio interface like a Focusrite Scarlett 2i2 gives you a much cleaner, richer, and more controlled sound. It also opens the door to easily adding a second microphone for an in-person co-host down the line. A boom arm is another game-changer, letting you position the mic perfectly while clearing up valuable desk space.
Core Components for The Professional Setup:
- XLR Dynamic Microphone: The Rode Procaster or Shure SM58 are industry workhorses, known for that classic broadcast-quality sound.
- Audio Interface: A two-channel interface like the Focusrite Scarlett 2i2 provides excellent preamps and gives you room to grow.
- Boom Arm: Something like the Rode PSA1 improves both your mic technique and your desk ergonomics.
- Studio Headphones: An upgrade to a pair like the Audio-Technica ATH-M20x offers better sound isolation and is more comfortable for longer sessions.
This setup is the sweet spot for most serious B2B podcasts. It delivers top-tier audio quality and a workflow that just makes recording easier. For a complete deep-dive, check out our guide on the full range of podcasting equipment needed.
The infographic below maps out this progression visually, showing how you can climb from a simple starting point to a full-blown studio setup.
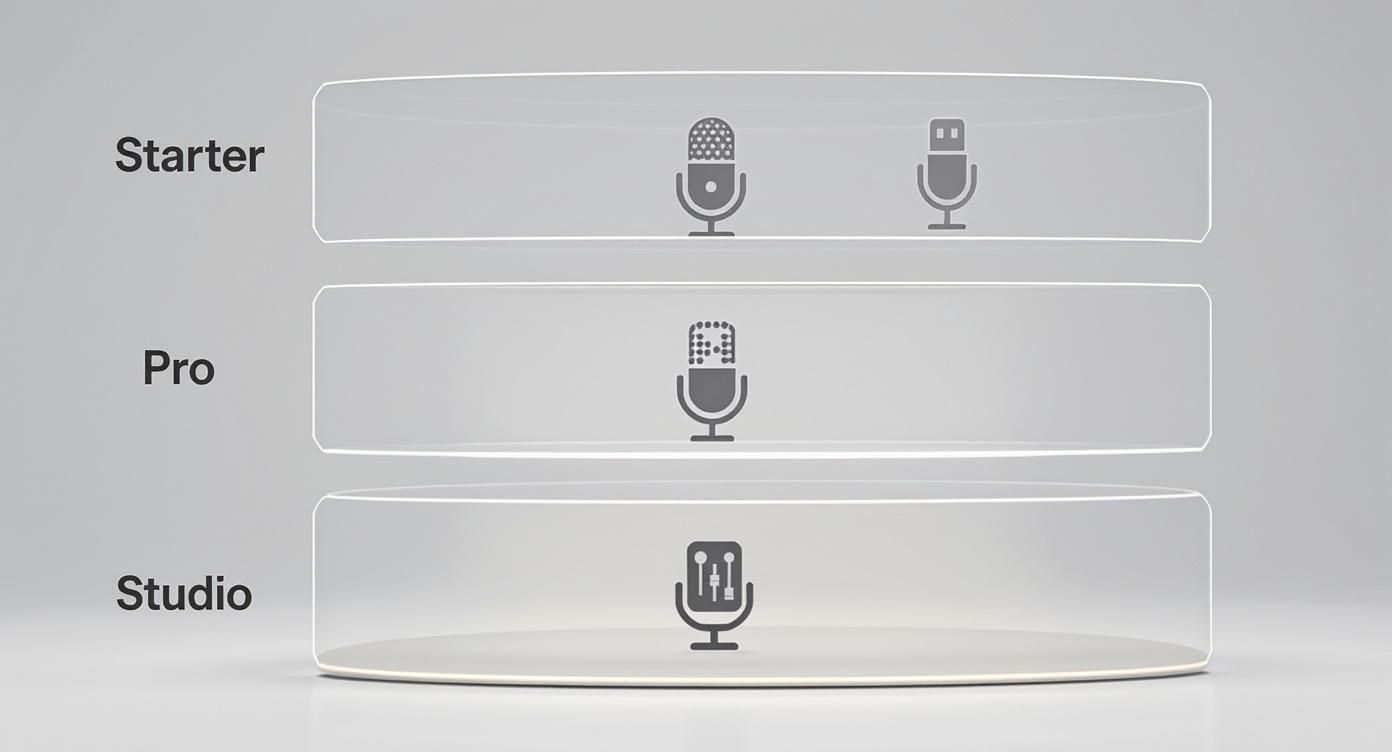
As you can see, each tier builds on the last, adding components that give you more control, better quality, and greater production flexibility.
Tier 3: The In-House Studio ($1,500+)
For B2B brands that are all-in on audio, building an in-house studio is the ultimate move for flexibility and quality. This is the setup for panel discussions, multi-host shows, and recording in-person guest interviews where everyone sounds impeccable. The heart of this operation is a dedicated mixer or an integrated production studio.
The real value of an in-house studio is control and efficiency. It empowers your marketing team to create high-volume, high-quality audio on demand—from your flagship podcast to internal communications—without ever needing to book an external facility.
A device like the Rodecaster Pro II is an absolute beast, acting as your mixer, audio interface, and recorder all in one. It lets you plug in multiple XLR mics, trigger sound effects, and easily manage audio levels for several speakers at once. This is what enables your team to produce complex, multi-layered audio that sounds just as good as a professional broadcast studio.
Core Components for The In-House Studio:
- Multiple XLR Microphones: Get 2-4 matching dynamic mics to keep everyone's sound consistent and professional.
- Podcast Production Studio/Mixer: The Rodecaster Pro II or Zoom PodTrak P4 are fantastic all-in-one solutions.
- Multiple Boom Arms & Headphones: Make sure every participant has a comfortable, professional-grade setup.
- Acoustic Treatment: Even some basic foam panels can make a huge difference in reducing room echo and improving overall clarity.
Taming Your Space for Pro-Level Audio
Here's a hard truth: you can have the most expensive microphone in the world, but if you record in a bad room, you will sound like an amateur. The real secret weapon of professional audio isn't more gear; it's getting your recording space right.
Echo, reverb, and random background noise are the enemies of clear audio. They can absolutely kill an episode before you've even finished your intro.
Think of it like a photographer's studio. They need controlled lighting to get a great shot. As a podcaster, you need a controlled acoustic environment to get great sound. A hard, empty conference room with bare walls and a tile floor is your audio nightmare—sound waves will bounce around like crazy, creating a hollow, distracting echo that screams "low-budget."
The good news? You don't need a massive budget or a construction crew to fix this. Simple, practical tweaks can make a huge difference in taming the reverb that tanks audio quality.
Soundproofing vs. Acoustic Treatment
Before we go any further, let's clear up a common point of confusion. These two terms get used interchangeably, but they solve completely different problems.
- Soundproofing: This is about blocking outside noise. Think building thicker walls or installing special windows to stop the sound of traffic or a noisy colleague from leaking into your room. It’s complicated and usually expensive.
- Acoustic Treatment: This is about controlling sound inside the room. The goal here is to absorb sound waves, stopping them from bouncing off hard surfaces. This is what kills echo and reverb.
For 99% of B2B podcasters, acoustic treatment is what you need to focus on. Unless you’re recording next to a construction site, your main battle is with the echo inside your own four walls.
Practical Tips for Better Room Acoustics
Improving your room's sound doesn’t have to cost a fortune. It’s all about adding soft, irregular surfaces that absorb and break up those pesky sound waves. Start with what you already have before you pull out the company card.
Low-Cost & DIY Acoustic Solutions:
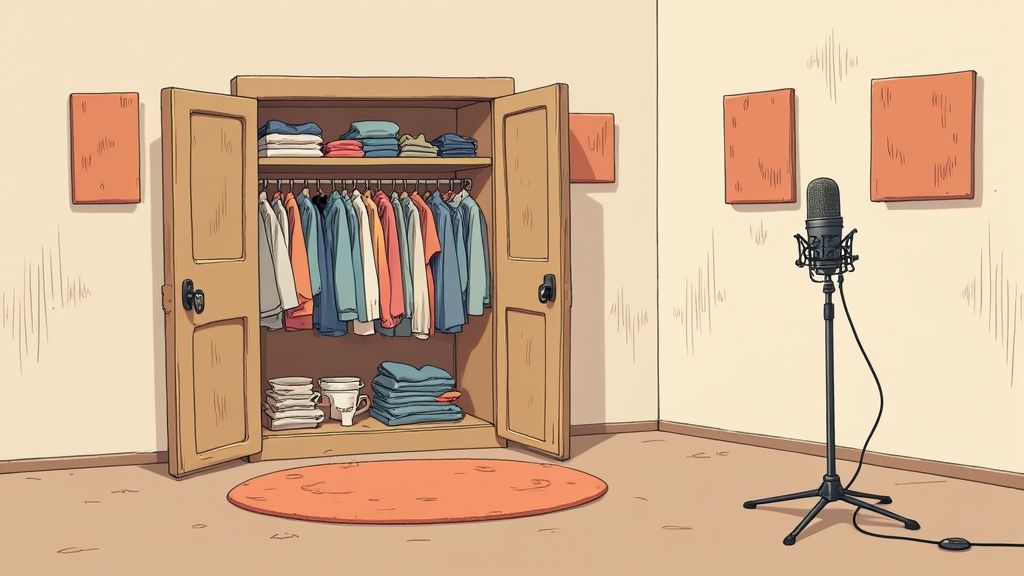
- Pick the Right Room: Ditch the big, empty boardroom. A smaller, carpeted room filled with stuff is your best friend. A living room with couches, bookshelves, and thick curtains is naturally better at absorbing sound.
- The Closet Studio: This is a classic podcaster's hack for a reason. A walk-in closet packed with clothes is a surprisingly effective, zero-cost vocal booth. All that fabric acts as a natural sound absorber, giving you incredibly clean audio.
- Use Soft Furnishings: Don't be afraid to get creative. Grab pillows, blankets, and cushions from around the office or house. Draping a heavy comforter over a couple of chairs to build a little "fort" around your mic works wonders. It might look a bit silly, but the results speak for themselves.
- Buy Some Basic Panels: If you're ready to invest a small amount, a set of affordable acoustic foam panels can make a noticeable difference. Stick them on the walls directly in front of and behind where you sit to catch the most immediate sound reflections.
Mastering your environment is one of the biggest leaps you can make toward studio-quality sound. It proves that the most important podcasting equipment needed sometimes involves optimizing your space, not just buying more gear.
Turning Your Podcast Into a Marketing Engine
Getting the right gear is really just the price of entry. Once you've sorted out the podcasting equipment needed to capture clean, professional audio, the real fun begins. A great B2B podcast is a monster of a marketing asset, but only if you have a smart strategy to grow its audience and actually drive business from it.
After your episode is perfectly edited and polished, you're left with the million-dollar question: how do you get it in front of your ideal customer? The answer is to see production and promotion as two sides of the same coin—they have to work together.
Amplifying Your Audio Content
Just hitting 'publish' and hoping for the best isn't a strategy. You have to actively chop up your audio and feed it into your entire marketing ecosystem. Think about it: a single 30-minute interview is packed with raw material.
- Social Media Snippets: Pull out the best insights and powerful quotes, and turn them into short video clips or audiograms for LinkedIn. At Fame, our B2B Social Media Agency is obsessed with turning these moments into content that stops the scroll and starts real conversations.
- Newsletter Content: Your podcast can be the main event in your newsletter. Our B2B Email Newsletter Agency helps clients build an engaged subscriber list by dropping episode highlights right into their inbox, nurturing leads and cementing their authority.
This screenshot from our homepage sums it up nicely—we see podcasting as a direct line to building authority and creating demand for B2B brands.
The big takeaway here is that your podcast isn't the final product. It's the fuel for a much broader content strategy that delivers results you can actually measure. For a deeper dive, check out these killer content repurposing strategies.
And once you start attracting that audience, you need a way to turn listeners into leads. Learning how to build a high-converting lead capture form is non-negotiable for this.
Ultimately, handing off production to an agency like Fame frees up your internal team to do what they do best: create incredible content and focus on the high-level strategy that connects your audio to real business growth.
A Few Final Questions We Get All The Time
As marketing teams wade into the world of podcasting gear, a few common questions always seem to pop up. Let's tackle them head-on with some practical, no-nonsense answers.
Is a USB Mic Enough, or Do We Really Need an Audio Interface?
For a solo host just getting their feet wet, a high-quality USB microphone is a fantastic starting point. It's the definition of plug-and-play—simple, valuable, and gets the job done with minimal fuss.
But if your ambitions are bigger, you'll outgrow it. As soon as you want multiple people in the same room, more precise control over your sound, or that top-tier broadcast quality, it’s time to graduate. An XLR microphone paired with an audio interface is the right long-term play. The interface gives you cleaner preamps (boosting the mic's signal with way less background noise) and opens the door to the entire world of professional studio microphones.
What’s the Single Most Important Piece of Gear to Splurge On?
The microphone. Full stop.
Your mic has the single biggest impact on how you sound. A great microphone can make an otherwise basic setup sound surprisingly professional.
On the flip side, a cheap, tinny mic will instantly torpedo your credibility, no matter how much you spend on everything else. If you have to prioritize the budget, this is where you put your money. As our founder, Tom Hunt, always says, listeners will forgive mediocre video, but they will never forgive bad audio.
How Much Should Our Company Actually Budget for a Podcast Setup?
For a serious B2B podcast that sounds polished and professional (our Tier 2 setup), a smart budget to start with is somewhere between $500 and $1,000.
This gets you a quality XLR mic, an audio interface, a proper boom arm, headphones, and all the necessary cables. It's a massive leap in quality from a basic USB setup and gives you a foundation you can build on for years.
If you're planning a full in-house studio for multiple hosts, you'll want to budget $1,500 or more to cover a mixer and the extra mics and stands.
Can't I Just Record a Podcast on My Smartphone?
You can, but you absolutely shouldn't—not for a B2B podcast where your brand's reputation is on the line.
A smartphone's built-in mic is made for phone calls, not for capturing broadcast-quality audio. It will pick up every echo in the room, the sound of your hand holding the phone, and a host of other distracting noises.
If you're in a pinch and have no other option, at least get an external microphone that plugs into your phone. It's an improvement. But a dedicated, computer-based setup will always deliver the reliable, professional results that properly reflect your brand.
Ready to turn that professional audio into a real growth engine? At Fame, we don’t just make podcasts; we produce B2B shows that build authority and drive measurable results. See how our B2B Podcast Production Agency can help you grow.